
Pay Per View videos are part of the biggest parts of the entertainment industry – these are media files which can be viewed by users, over the internet, from just about any device. This guide is designed to help webmasters who want to create their own website and rent videos on either a subscription basis or a pay-per-view basis.
This setup works, but is not limited to, the following situations:
- You are recording university courses with a subtle webcam and then providing the courses for a flat fee
- You want to create your own version of Netflix and charge users a monthly subscription – this works great with our Hollywood Demo
- You are providing videos of different workshops such as yoga
- You want to create a website dedicated to stand-up comedy shows
Requirements to Rent Videos
You will need a couple of things before you can start to rent videos with WpStream. Namely, you will need a working WordPress website and two or three plugins:
WpStream Plugin – This plugin is free and mandatory; it works with the WpStream Platform
WooCommerce – This free plugin will handle all the payments done through your website; it is used to create pay per view products
WooCommerce Subscriptions – This premium plugin handles payments based on a subscription model
Feel free to check our tutorial on how to install WpStream & import demo content, as well as our Hollywood Demo Guide.
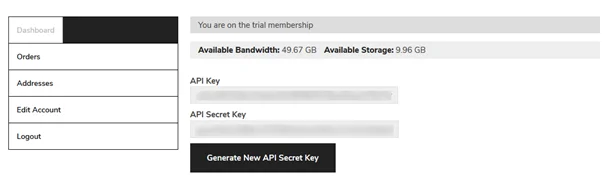
After installing the WpStream platform on your WordPress website, visit WpStream.net and register for an account. You will have several broadcasting packages to choose from, depending on the amount of storage space and bandwidth you think you will need. The user account dashboard looks like this:
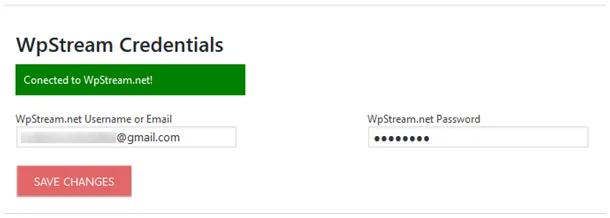
Go to your WordPress dashboard and click on WpStream, then click on WpStream Options. You will have to connect your website to WpStream by adding your account details. After adding the correct details a “Connected to WpStream.net!” message will appear:
Creating Pay Per View Video From Uploaded File
To create a pay per view video from an uploaded media file, you’ll have to head to your WordPress Dashboard and click on WpStream, then WpStream Media Management.
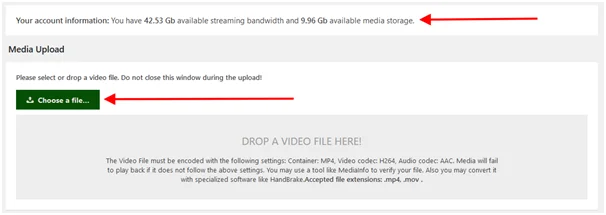
Here you will see your available bandwidth as well as your available media storage. Now click on the “Choose a file” button and select the file you want to upload.
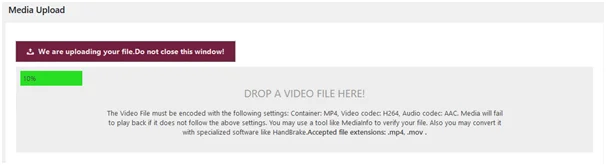
It may take a couple of minutes, depending on the size of the file you are uploading, so be patient.
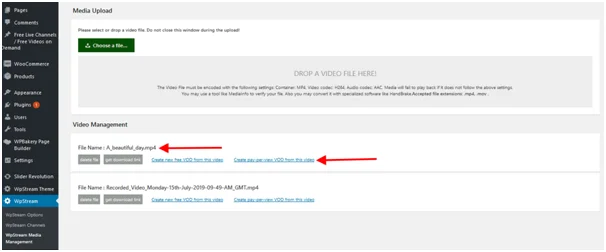
The media file we just uploaded is now ready. Let’s click on “create pay-per-view VOD from this video”.
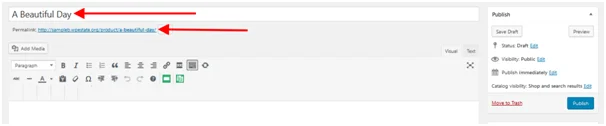
We are now redirected to the “Add new product” page. Let’s add a title for our pay-per-view video. This will be the permalink of the channel.

Now let’s add a price for our pay-per-view video. Also remember to set “Product data” to “Video On Demand”:
Let’s publish the product and see how it looks in the front-end of our website.
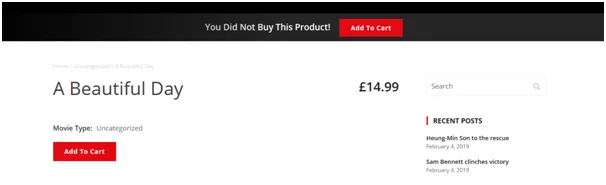
Users accessing this product will get a “You Did Not Buy This Product!” notice. Once a purchase has been made, the users will be allowed to see the video.
Creating Pay Per View Video From Recording
With WpStream, website owners are able to record their live streams and offer them as pay-per-view videos for their users. Let’s see how it’s done.
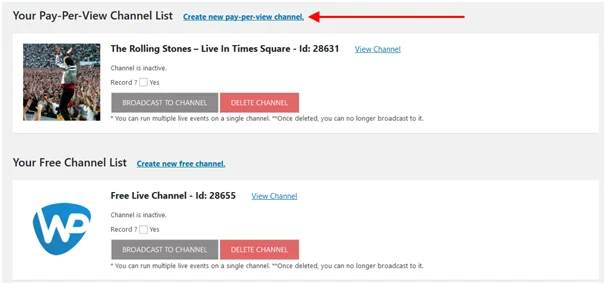
We’ll first start off by creating a pay-per-view channel by going to our WordPress dashboard and clicking on “WpStream”, then “WpStream Channels”. Here you will have to click on “Create new pay-per-view channel”:
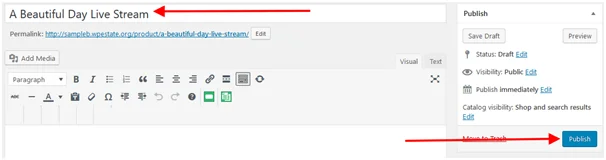
Make sure you set “Product data” to “Live Channel” and add a price for your channel:

Once you have added all necessary details, click on “Publish”:
Make sure you tick the “Record?” box. This means that your website will keep a copy of the live stream you are about to make.
pay per view videos
Now click on “Broadcast to Channel” and wait for the channel to start. Once the channel can start, open up your favourite streaming software and add your URL & Stream Key:
Let’s keep the stream running for a couple of minutes, and then stop it. Now visit your WordPress dashboard, then click on “WpStream” and “WpStream Media Management”. Here you will see a recording of the stream we just stopped.
Click on “Create pay-per-view VOD from this video” and you will be redirected to a product page:
Make sure you set “Product Data” to “Video On Demand” in the dropbox. You will also have to add a price for your VOD.
Once you have added all necessary details, simply click “Publish”.
Conclusion
The WpStream platform allows website owners to create different types of products from their recorded or uploaded video files and pay per view videos. It’s also important to note that all streams are encrypted and safe from prying eyes. Feel free to check our article on how to manage your video library with WpStream.
Table of Content