


Estimated reading time: 8 minutes
Selling access to live streams means letting people pay to watch your live video events online. This article explains how a site owner can do that using WooCommerce and WpStream. It will show each step in simple terms. The goal is to make setting up paid live streams easy. By the end, anyone can understand how to sell access to live streams on a website.
You can also check out the video tutorial I did showing you the process:

What Is a Live Stream and Why Sell It?
A live stream is a video broadcast that happens in real time on the internet. It is like a live TV show, but it streams online. People can watch it happen on their computers or phones. For example, a teacher can live stream a lesson, or a musician can live stream a concert. Viewers see the action live, not a pre-recorded video.
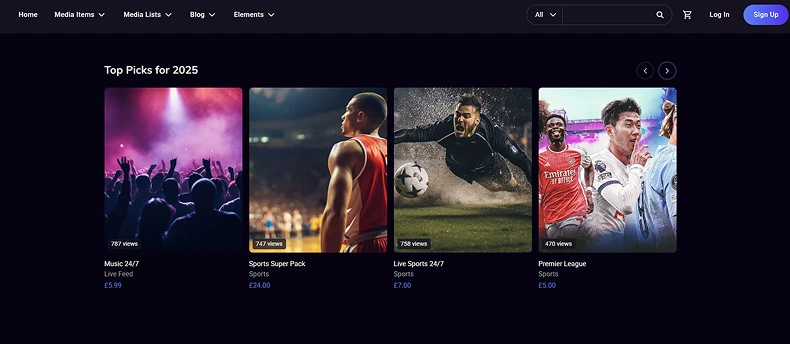
Many creators offer free live streams, but some events are special. They might want to charge money to watch these live events. Selling access is like selling a ticket to a show, but the show is online. Viewers pay a fee to join and watch the live video. This is common for special concerts, classes, workshops, or online sports games.
Why would someone sell access to a live stream? One reason is to earn money from their work. Organizing a live event takes time and effort. Charging a ticket price helps the host get paid for this effort. Another reason is to make the Event exclusive. When viewers pay to join, they feel it is an exceptional experience. Also, a paid stream often has no random ads, giving watchers a better experience.
Selling live stream access benefits both creators and viewers. The creator (site owner or streamer) can cover costs and profit from their content. They have control over who watches because only paying viewers get in. Viewers benefit by getting high-quality content or unique events that are not open to everyone. It creates a fair exchange: the host provides something valuable, and the audience supports them by buying a ticket.

Preparing Your Website for Live Streaming
Before setting up a paid live stream, some things are needed. Make sure to prepare the website and tools below:
- WordPress Website
- WooCommerce Plugin
- WpStream Plugin
- Webcam, phone, or Streaming software like OBS Studio
- WooCommerce Subscriptions (Optional – if you want subscription payments)
- Hello WpStream Theme (Optional – if you want a dedicated streaming website template)

With these items in place, the website is ready for the next steps. The site will serve as the stage, and the plugins will be the tools. WooCommerce will handle ‘ticket’ sales, and the streaming plugin will show the live video only to those who paid. Now it’s time to set everything up step by step.
Steps to Sell Live Stream Access on WordPress
Now the guide will walk through how to sell access to a live stream on a WordPress site.

- Set Up the WordPress Site
Make sure your WordPress install works and is updated. If it’s a new site, choose a simple theme that handles video well so viewers can easily find the live stream page. - Install WooCommerce for Payments
Go to Plugins → Add New → install WooCommerce. Activate it and follow the setup steps. WooCommerce creates the product, checkout, and payment flow for selling your live stream ticket. - Install WpStream for live and video streaming
Activate it and look for the new menu it adds. WpStream connects with WooCommerce for paid access. - Configure the Streaming Plugin
Go to WpStream → Live Channel → Add new Pay-Per-View Channel. Add a title, description, product image, tags, etc. Under ‘Product Data’ make sure you select ‘Live Channel’. You can add a price here. Publish your newly created Pay-Per-View Channel. - Test the Purchase Flow
Before the event, do a full test. Buy the ‘ticket’, verify payment, confirm access, and check that the player shows a standby or test stream. - Connect Your Streaming Software
Open OBS Studio (or your preferred tool). WpStream will give you a server URL and stream key. Paste them into OBS → Settings → Stream. - Go Live on Event Day
At showtime, click “Start Streaming” in OBS. Viewers who purchased access can log in and watch. - After the Stream
If you’ve chosen to enable recording before your live event, your recording will be available in WpStream → Recordings. You can share it with your buyers as a ‘replay’.


By following these steps, the WordPress site will function like a virtual venue. Visitors come to the site, pay for a ticket, and gain entry to watch the live Event. The combination of WooCommerce and WpStream handles the heavy work, like gating the content and processing payments.


The site owner primarily needs to focus on creating content and ensuring the stream runs smoothly.
Getting People to Watch and Buy Tickets
Setting up the technology is only part of the job. The next part is making sure people know about the live stream and want to buy access. Here are some tips for attracting an audience to a pay-per-view live stream:
- Announce the Event Early
- Explain How to Buy Access
- Promote on Multiple Channels
- Set Expectations for the Stream
- Provide Support

By actively promoting the live stream and guiding users, the site owner can increase ticket sales. Clear communication is key. When people understand how to join and how exciting the Event will be, they are more likely to purchase access. Remember that even a simple live stream can seem new to some viewers, so friendly guidance goes a long way.
Time to Go Live
The website is now set up to sell and stream live events. The site owner has everything ready to go live and share content with paying viewers. With WordPress, plugins, and a solid plan, selling access to live streams becomes straightforward.
This approach allows a creator or business to run their own online show, class, or a webinar and earn money from it. They no longer have to rely only on free platforms with ads or strict rules. Instead, they control the Event on their own site. They set the price, manage the content, and interact directly with their audience.

Conclusion
Selling access to your livestream may not have seemed easy at first, but each step was manageable without any coding. Using WooCommerce and a streaming plugin means most of the technical aspects are handled by those tools. The site owner can focus on the live stream’s content, knowing that viewers who paid will have access.

Now it’s time to put this into action. Plan a live event that you are passionate about sharing. Set it up on your WordPress site using the steps above. When you go live, you will see people joining in to watch and support your work. Selling access to live streams opens a new way to connect with your audience and get paid for doing what you love. Happy streaming!
When you link your stream to a WooCommerce product, the system checks if the viewer is logged in and has purchased access. Only then will the video player unlock. The WpStream plugin automatically creates pay-per-view (or subscription) streams that stay hidden from anyone who didn’t buy a ticket.
You don’t need expensive gear. A camera, microphone, and streaming software like OBS are enough. Your WordPress site handles the paywall, WooCommerce handles payments, and WpStream broadcasts your video.
Yes, WpStream supports recording. Many tools let you save the stream and offer the replay only to users who purchased access. You can upload the recording to your site and offer it for free, monetize the replay as well, or attach it to your live stream so that those who already paid for the live stream can watch while those who didn’t pay for the live access can pay for the replay.