Recording live streams – locally or to the cloud?
Recording live streams is a great thing about live streaming. Viewers can watch in real time and those who missed out can come back later to check out your recorded live.
A live stream is anything you want it to be and you can make the most of it by recording it for later. Whether you want your live stream to be saved for viewers to watch later, you want to edit it and post it on your website (or on any other platform), or you want to create an On-Demand video to sell.
Whichever you choose, WpStream helps you achieve your goals. In this article, you will find out whether it is best to Record locally or to the Cloud. But first…
Recording live streams: Definitions
Recording
is the action or process of recording sound, video, or a performance for subsequent reproduction or broadcast. Back in the day we used cassettes and video tapes. Some may remember setting the DVR (Digital Video Recorder) to record your favorite cable TV shows.
Today, one way that recordings have still remained highly popular is with live streams. It seems like every social media platform has live stream capabilities. Although people love watching live streams (which is why Twitch is so popular), not everyone is available at all times to watch the live stream as it is happening.
Sure, some may be lucky enough but others may be at work or even in a different time zone. It would be unfair to those people to miss out on your live stream because of all these variables.
You will want to do them a favor by recording live streams to watch later. They won’t be able to interact with you ‘live’ any more, but it is still better than nothing.
Video File
is the recorded draft of your live stream. After your recorded live stream ends, your video file gets saved in your WordPress admin under ‘WpStream’ and ‘Media Management’.
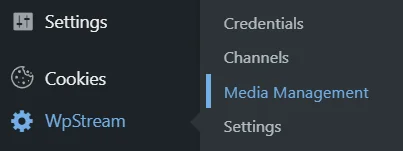
Here, you can delete the file, download the link (to download the file to your computer), create a free VOD, or create a Pay-Per-View VOD.

This video is saved on the WpStream’s servers (cloud) and it does not affect your local storage (more on this later on in the article).
VODs
are recordings of live streams that have been converted into a video product. As discussed above, a VOD is useful because you can offer your viewers your live stream even if they were unable to watch it live. You can offer it for free, create pay-per-view VODs, or even subscription VODs. This way, you keep profiting off the same live stream even after it has ended.
Live streams have become popular in the fitness and e-commerce industries this past year because you can easily post or embed your VODs to any page on your website and offer your viewers the best viewing experience. You can create VODs whether you record locally or to the Cloud.
Recording locally (i.e. at the source)
Local recording allows you to record a audio or video/live stream to a local computer. We usually recommend that users broadcast using an external broadcaster for professional live streaming. Each external broadcasters offers you the opportunity to record your live stream before you begin streaming.
After you stop the recording, your file will be saved to your computer in your downloads or in your documents- depending on where you want to add it. This is useful because you will have a back up of the live stream on your own computer. If you want to share it later, you can always upload it to WpStream via ‘Media Management’.
Obs Studio
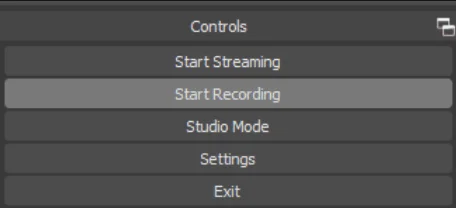
Wirecast

Xplit

Your videos will be saved on your local computer.
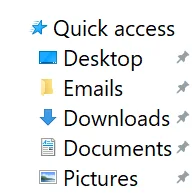
You can then upload your video on WpStream by going to ‘Media Management’
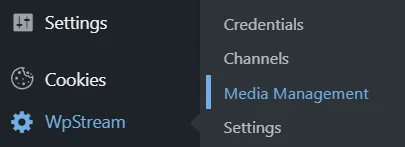
Click on ‘Choose File’ and find your recording file and upload.


Refresh the page and you can then create a free VOD or Pay-Per-View VOD from this upload

Recording to the Cloud
“The Cloud” refers to servers that are accessed over the Internet, and the software and databases that run on those servers. Cloud servers are located in data centers all over the world.”
by Cloudflare
You record to ‘the Cloud’ so that you do not have to use your own storage to do this. You may have heard of Google Drive, DropBox, and many other websites where you can store your files. This saves you A LOT of storage space. Similarly, once you get started with WpStream, you will find that you can save your recordings to its servers so that you do not have to use up your own.
Another note:
The plugin is deliberately set up so that videos are automatically clipped at 45 minutes (or at 1 GB) when recorded to the Cloud. If you need longer recordings you can either:
A. record locally and upload the files later
B. download the pieces, join them together into a single video using a video editor, and re-upload the result
To record your live stream on WpStream, you will have to go to WpStream Channels.
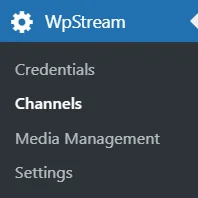
Create a channel (free or Pay-Per-View), add a title, bio, and a featured image then publish
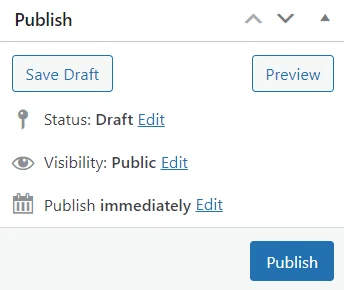
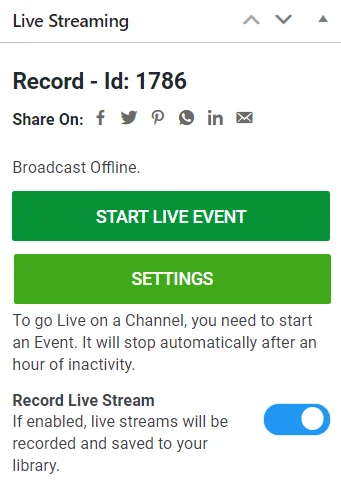
Once published, click on ‘Settings’ and enable ‘Record Live Stream’. ‘Start Live Event’.
Fast forward to after your live stream has ended, your recording would have been saved under WpStream ‘Media Management’
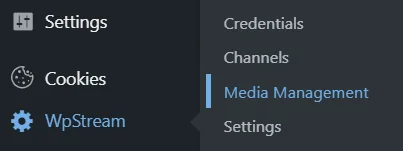
You can now convert this ‘video file’ into a free or Pay-Per-View VOD directly, or get the download link and save it locally.

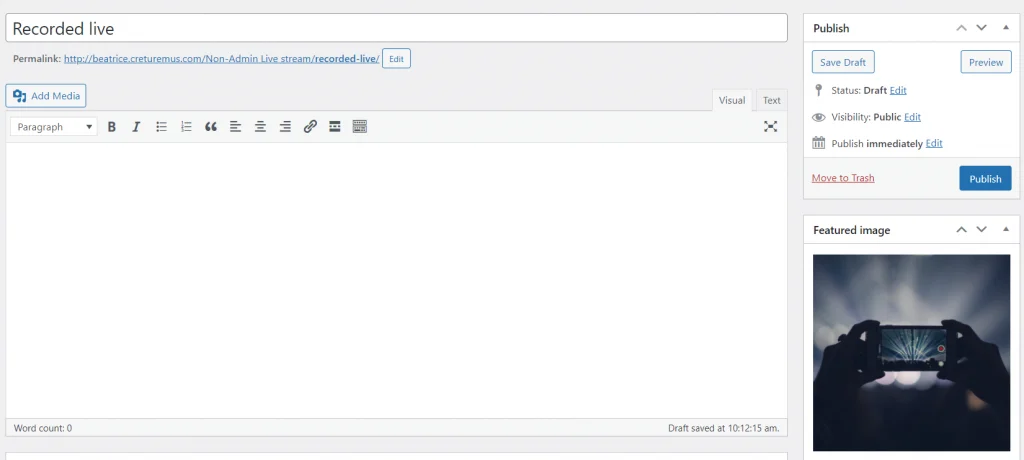
I will create a free VOD from this video, add a title, featured image, and then ‘Publish’
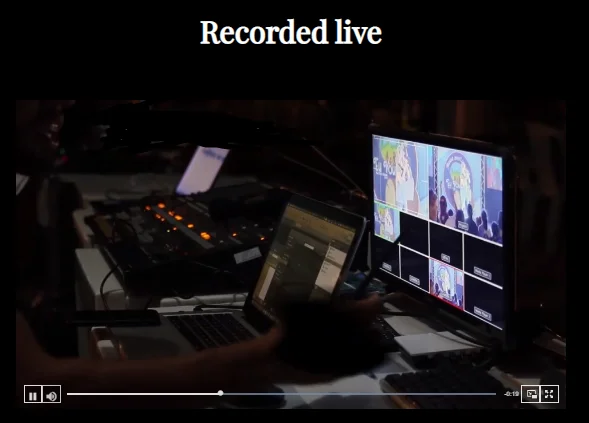
Once published, you can click on the ‘permalink’ and will be taken to the video where your viewers can watch, pause, skip forward, and go back, and enjoy.
Record locally or to the Cloud?
The safest option is for you to record it locally using OBS, Wirecast, Larix, or any other external broadcaster on your computer. This is because although chances are very low that the recording to WpStream’s Cloud will go wrong, the chances are still not at zero.
We recommend that you always record your video locally and you can upload it later on WpStream or on any other platform such as Google Drive. You can then delete it from your computer to save your space.
Several factors that could affect your recording from saving to the cloud could be:
- Inconsistent internet connection
- Running out of storage data
- Other technical errors
Pros & Cons of recording live streams differently
Recording to the Cloud
- Pros:
- Less steps to share your video than local recording
- Your video goes into your ‘Media Management’
- Cons:
- WpStream cloud storage may be limited so you will most likely need to either delete older videos or move them to a new location
- Videos are automatically clipped at 45 minutes (or at 1 GB)
Recording locally
- Pros:
- Best for editing videos with third-party video editors (iMovie, Camtasia, Premiere Pro, etc.)
- Choose where to upload your video (WpStream, OneDrive, etc.)
- Can record for however long you wish
- Cons:
- Sometimes files may be saved locally in a non-universal format that may not be playable on certain devices (MP4, Video codec: H264, Audio codec: AAC)
- Requires additional steps to share your video, especially if you are recording with WpStream
Recording live streams: Conclusion
Overall the answer to how recording live streams should be carried out – ‘Record locally or to the Cloud’ depends on whether you are a risk taker or not. However, it is recommended that you always record your live stream locally for safe keeping. Do this until you know for sure that the recording has also been saved to WpStream.
Although we can assure you that odds are that your recording will not get affected on WpStream, technology is hard to predict and errors can sometimes occur. Your best bet is to have it saved in more than one way. Later, you can always delete videos as you see fit to get more space for new content.
Start your free trial with WpStream today and experience the ability to broadcast live events, set up Pay-Per-View videos, and diversify the way you do your business.
Table of Content


