


Updated February 9th, 2026
Over the past few years, live streaming has significantly grown in popularity, and it’s no wonder. It’s currently one of the most effective tools to engage with a global audience and gain popularity.
While live streaming is a powerful tool, there’s an added layer of value that can be harnessed effectively – recording your live stream. By doing so, you can easily preserve your content, providing a broader scope to repurpose it for different platforms and building strong monetization strategies.
To meet this demand, hundreds of tools and methods have emerged, making the selection process a bit more complicated than it should be.
So, to make things easier, we’ll explore six simple and effective ways to record your live stream content and explore different ways to monetize and repurpose your recorded content.
Let’s start!
Why should you record your live streams?
Recording your live video content not only remarkably expands your reach but also enables you to enrich your content strategy, unlocking numerous monetization opportunities. However, there’s more beyond that. Let’s take a look.
- Increased accessibility: Recording live streams extends accessibility and lets viewers who couldn’t attend the live broadcast watch the content in their free time. This inclusivity broadens your viewership and ensures that your content remains accessible.
- Content repurposing: You can edit, repackage, or segment your recorded live streams into shorter, engaging content pieces. These can serve as promotional materials, tutorial videos, and snippets for social media or be reused as pre-recorded content for future livestream events.
- Audience engagement: Comments, shares, and discussions after the initial broadcast lead to ongoing engagement and cultivate an active online community.
- Monetization potential: Recorded live streams can be used as platforms for ads, sold as on-demand content, or offered as part of a subscription service. Each of these methods presents an opportunity to generate additional income.
- Performance analysis: Hosts can review their performance and analyze viewer reactions. This feedback is essential for making improvements in subsequent live broadcasts. You can pinpoint areas for enhancement, refine your delivery, and fine-tune content based on audience responses.
These advantages collectively contribute to building a long-lasting presence in the fascinating world of live streaming.
6 Methods for recording live streaming video
Now, as promised, we’ll explore the best methods and tools for recording live streams.
1. Recording from your streaming platform
Many live streaming platforms, like WpStream for WordPress, offer a convenient feature to record and store your live streams for future use. This option makes it easy to archive your content and provides several other advantages:
- Convenience: With WpStream, all of your recorded live streams are readily available from your central dashboard, so you can immediately manage and access your content.
- Ease-of-use: Setting up stream recordings with WpStream is a straightforward process. You can enable this feature with just a few clicks.
- No reliance on third-party tools: When you use your streaming platform to record, you eliminate the need for third-party tools or software. WpStream’s recording functionality is integrated directly into the platform, simplifying the process.
- Save storage space: Recordings are saved to cloud servers or can be stored locally. By saving to the cloud, you don’t have to worry about filling up your own storage devices.
If you’re looking to record your live video stream on WpStream, you can follow these steps:
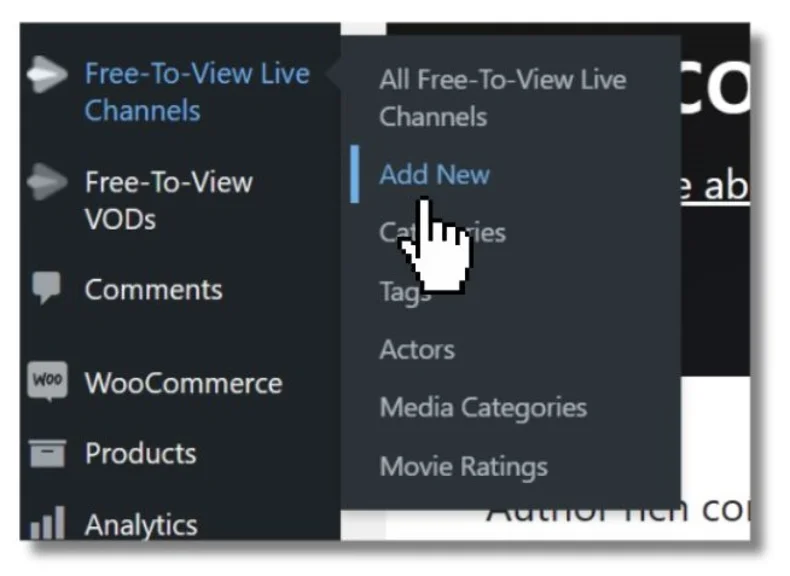
- Create a new channel: Begin by navigating to Free-To-View Live Channels and selecting Add New.

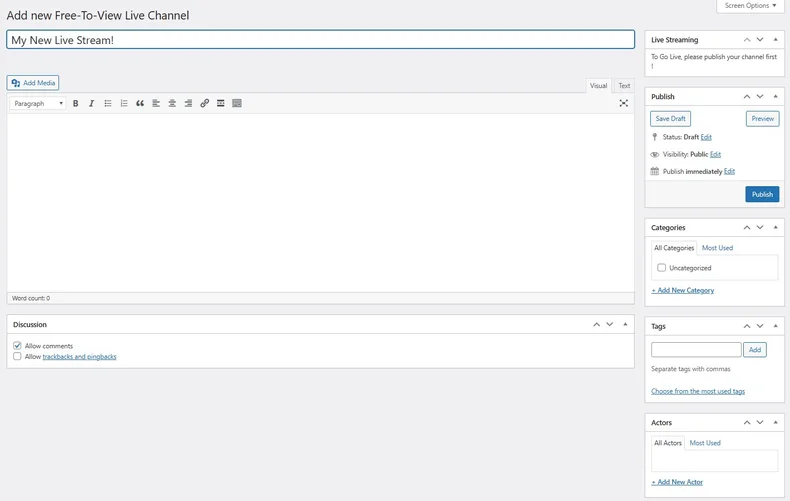
- Customize your channel: Personalize your channel by adding a description, featured image, categories, tags, and any other relevant information.

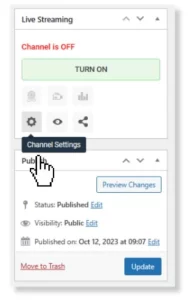
- Configure live streaming settings: Under Live Streaming, click the Channel Settings button. This will lead you to a range of options to customize your streaming settings. Look for the option to Record Live Stream and click the slider to enable it.

- Automatic recording: Once you’ve enabled this feature, all live streams from your channel will be automatically recorded and saved to your library. This hassle-free process ensures that your content is securely archived and easily accessible whenever you need it.
By recording your live streams using WpStream’s integrated feature, you can focus on delivering live content while knowing that your past broadcasts are safely saved.
That said, it is recommended that streamers record from WpStream AND another streaming app (like OBS). By recording your stream both locally and to the cloud, you can avoid issues with storage space when streams run for longer than expected. Recording your stream locally will ensure that you have a backup of your content, which you can always upload to WpStream later, for example, when you upgrade your plan to add more storage space.
2. Encoders
Encoders play a crucial role in live streaming by converting audio and video signals into a digital format suitable for online transmission. They act as intermediaries between your camera or microphone and the streaming platform, ensuring that your content can be broadcast over the internet. Many encoders offer the valuable function of recording your stream content for later use.
Some hardware encoders come equipped with the capability to record your livestream content. Depending on the model, these encoders may feature internal storage for saving your content, or allow you to connect an external hard drive for this purpose.
If you choose to use a hardware encoder, be aware of the following benefits and drawbacks:
- Benefits: Hardware encoders are known for their speed and quality. They don’t consume Central Processing Unit (CPU) resources, leaving your computer’s processing power available for other tasks and offering a smoother streaming experience.
- Drawbacks: They tend to be relatively costly, which can be a limiting factor for many streamers. They are also very technically involved compared to software alternatives, potentially requiring a steeper learning curve.
The recording setup and capability of hardware encoders can vary widely depending on the specific model you choose.
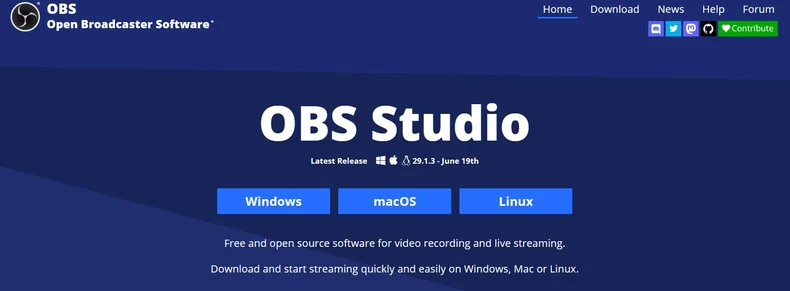
An alternative to hardware encoders is software encoders. Several software encoding options, such as OBS (Open Broadcaster Software), enable you to record your stream content directly from the source. This approach differs from using OBS as a screen recorder (which we’ll explore in more detail later), as you capture the transmission before it reaches the destination platform. The benefits and drawbacks of software encoders are:
- Benefits: Software encoders are often more budget-friendly and user-friendly compared to their hardware counterparts. They are a versatile choice for many streamers.
- Drawbacks: However, they do consume CPU resources during recording, potentially impacting the performance and reliability of your live stream, especially if your computer lacks sufficient processing power.
The choice between hardware and software encoders for recording will depend on your specific needs, budget, and technical proficiency.
3. Desktop live stream screen recorders
For streamers looking to capture and save their live streams for future use, desktop screen recording software is a valuable tool. Applications like OBS Studio, Movavi Screen Recorder, and Camtasia provide great screen recording options that offer distinct advantages:
- Wide customization options: Desktop screen recording software provides an array of customization options, allowing you to fine-tune the recording process to meet your specific requirements. You can easily adjust settings, select the portion of the screen you want to record, and even incorporate multiple audio sources, enabling you to capture precisely what you need.
- Choice of output formats: Many screen recording tools offer flexibility in choosing your preferred output format. This feature is invaluable for post-production, as it allows you to select the format that best aligns with your needs, from high-definition video to various encoding options.
- Easy integration: Solutions like OBS Studio seamlessly integrate with numerous popular streaming platforms, including WpStream. This allows you to enjoy the benefits of streaming through these platforms while also taking advantage of the advanced customization options available when recording via OBS.
However, they still come with one significant disadvantage:
- Lower quality output: The main drawback of screen recording lies in the quality of the recorded content. Screen recording captures the stream as it appears on your screen, which may not match the source quality. This lower quality can be a limiting factor, particularly for content creators who prioritize maintaining the highest video and audio quality.
However, despite this drawback, screen recording solutions provide substantial benefits for streamers, especially in terms of customization and output formats, making them a viable choice for many.
For those opting for OBS Studio as their screen recording solution, here are the steps to record live streams:
- Download and install OBS Studio: Begin by downloading OBS Studio and following the installation process, which includes a setup wizard to configure the software.

- Configure recording settings: Once installed, open OBS Studio, navigate to Settings, and then to Output. Scroll down to the Recording section within the settings. Here, you can adjust various recording settings, including video output options, output file format, and quality settings, tailoring them to your preferences.
- Start recording: After configuring your recording settings and setting up your live stream within OBS Studio, return to the main OBS dashboard. Click the Start Recording button to initiate the recording process.
- Specify output location: OBS Studio typically saves your recorded stream video to the Videos folder by default. However, you can easily adjust this setting in the recording preferences to select a different location if you prefer.
If you still need a hand navigating OBS Studio and getting set up, they have a helpful Quickstart guide to get you started.
4. Built-in screen capture tools
Both PCs and Macs come equipped with built-in screen capture functionality, which you can utilize to record your live stream videos.
While these tools offer the convenience of being readily available, there are certain pros and cons associated with using them for screen recording:
Pros:
- Free of charge: One of the most significant advantages of using built-in screen capture tools is that they come at no extra cost. They are readily available on your PC or Mac, making them accessible to all users without the need to invest in additional software.
- Ease of use: These tools are generally designed to be user-friendly, making them ideal for those who prefer a straightforward and hassle-free screen recording process. You can start capturing your screen with just a few clicks.
Cons:
- Limited customization: Unlike dedicated screen recording software, built-in tools provide limited customization options. You have less control over settings like video quality, output format, and recording area.
- Lower recording quality: The quality of recordings made with built-in tools may not match the original content’s quality. This is especially important for streamers who prioritize maintaining high-quality video and audio.
If you’re choosing to set up your built-in screen capture tools, here is how you can do it:
For PC:

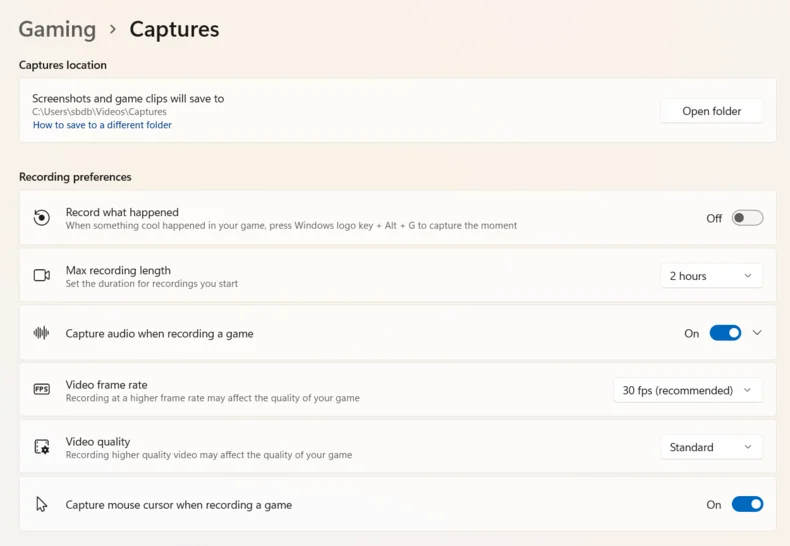
- Open the game bar: Press the Windows + G keys on your keyboard to open the Game Bar control panel.
- Start recording: Click Capture and then the Record icon to initiate the recording (or press Windows + Alt + R).
- Capture status window: A Capture Status window will appear, displaying the recording timer, a Stop button, and a Microphone button that you can toggle on/off to add commentary. The tool will automatically capture all internal sounds from your PC.
- Save your videos: Videos recorded using this method will be automatically saved in your Videos folder within the Captures subfolder.
For Mac:


- Open the recording app: Press Shift + Command + 5 to open the Mac recording app. A control bar will appear at the bottom of your screen, giving you options to record a portion of your screen or the entire screen.
- Start and stop recording: Click Record to begin recording your live stream, and press Stop to conclude the recording.
- Save your video: To access and save your video file, click on the preview of the recording located in the bottom right corner of your screen.
While built-in screen capture tools offer a straightforward way to record live streams without additional software, it’s important to consider the limitations they come with.
Streamers with specific requirements for quality and customization may find dedicated screen recording software, or streaming platforms with built-in recording capabilities like WpStream, more suitable for their needs.
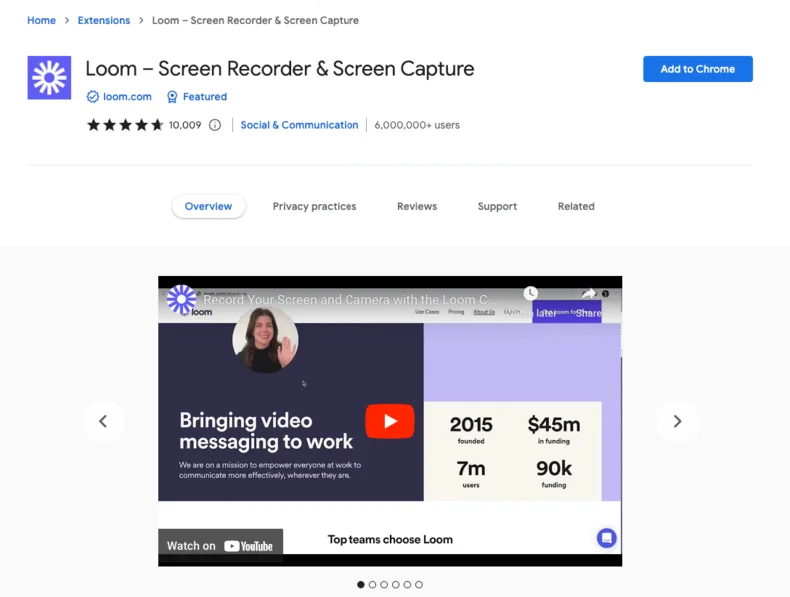
5. Browser extensions
Another accessible method for recording your live stream content is to utilize browser extensions like Screencastify, Loom, or the Chrome extension of Movavi Screen Recorder. These browser extensions offer a straightforward approach to screen recording, but they come with their own set of benefits and limitations.
Pros:
- Cost-efficient: Many browser extension options are available for free, making them an economical choice for those on a budget.
- User-friendly: These tools are generally designed with user-friendliness in mind. They require minimal setup and offer a simple, hassle-free approach to screen recording.
Cons:
- Limited customization: Browser extensions typically provide fewer customization options compared to dedicated screen recording software. You may have limited control over video quality, output format, and recording area.
- Reliability issues: Some browser extensions may be less reliable in certain situations, which can be frustrating when recording important live stream content.
- Lower video quality: The quality of videos recorded with browser extensions may not match the quality of the original content. This can be a concern for streamers aiming for high-quality output.
- Limited capture area adjustment: Many browser extensions offer limited options for adjusting the capture area, which can be problematic if you need to focus on specific portions of your screen.
While the exact setup for browser screen extensions varies depending on the specific extension you choose, the process is generally straightforward. Here’s a simplified example using Loom:
- Navigate to Chrome’s Extensions area and click on the Loom extension.

- Customize your recording settings as needed, including choosing the area you want to capture and toggling audio options.

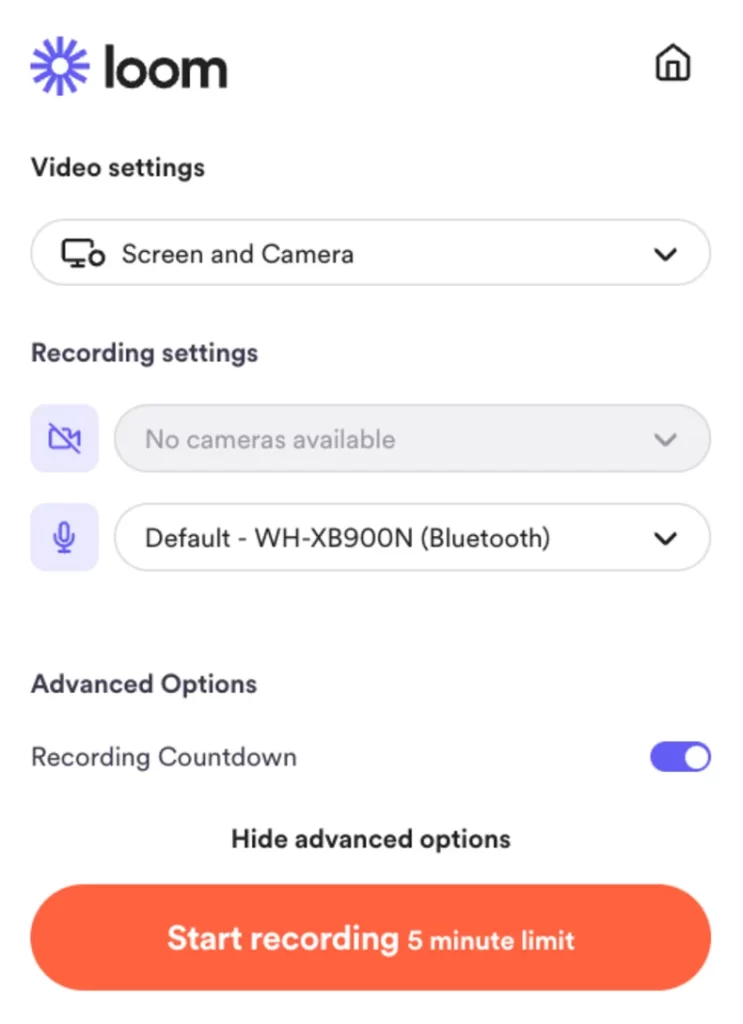
- Click the Start Recording button to initiate the recording process.
- Videos recorded using Loom are typically saved to your Loom cloud library, making them easily accessible for future use.
Browser extensions offer a convenient and budget-friendly way to capture your livestream content, but they may not be the best choice if you require advanced customization, reliability, or top-notch video quality.
6. Mobile apps
Both iOS and Android devices provide a range of screen recording apps that empower users to record live stream content directly from their mobile phones. However, it is worth noting that if you’re looking to record your own livestream content while broadcasting, mobile apps won’t be the best choice. Owing to the processing power required to stream directly from your mobile device, using a screen recording app while streaming may compromise your stream quality and lead to device crashes.
Despite these limitations, mobile screen recording apps can be a good choice for viewers who are looking to record live content directly to their phones. Here are some examples of apps you may want to try, depending on your device:
iOS screen recording apps
- Record it!: This iOS app simplifies the process of screen recording, allowing users to capture live streams, gameplay, and more directly from their iPhone or iPad.
- Go Record: Another iOS screen recording app that offers versatility and ease of use, making it a convenient choice for those looking to record their live streams on the go.
Let’s take a look at the pros and cons of these:
Pros:
- Flexibility: iOS screen recording apps eliminate the need for external hardware, offering the flexibility to record directly from your mobile device, making them a handy choice for spontaneous recording.
Cons:
- Lag and glitches: Some iOS screen recording apps may encounter issues with lag or glitches, affecting the overall recording quality.
- Intrusive display ads: Free apps in this category often rely on display ads, which can be intrusive and disrupt the user experience.
Android screen recording apps
- AZ Screen Recorder: AZ Screen Recorder is a popular choice for Android users, providing a user-friendly interface and diverse recording options.
- Mobizen: Mobizen is another well-known Android screen recording app, allowing users to capture live streams and other content with ease.
Pros:
- Convenience: Android screen recording apps are a convenient option for recording live streams directly from your Android device, offering flexibility and accessibility.
Cons:
- Lag and glitches: Similar to their iOS counterparts, Android screen recording apps can experience issues with lag or glitches, impacting the recording quality.
- Intrusive display ads: Free Android screen recording apps often feature display ads that can be intrusive, detracting from the recording experience.
The setup and functionality of these solutions may vary depending on the specific app you choose. Users should select the app that best aligns with their mobile platform and meets their recording needs while considering the potential drawbacks and challenges associated with each app.
Monetizing and repurposing livestream recordings
One of the benefits of recording a livestream that we mentioned from the very beginning is the opportunity to monetize and repurpose these recordings. Let’s explore why and how to do it by taking a look at the benefits first:
- New revenue stream: Monetizing your live stream recordings opens up an additional income source. You can charge for access, generating revenue beyond the initial live broadcast.
- Reaching missed audiences: Not everyone can attend your live stream in real-time. Recorded content allows those who missed it to catch up, expanding your audience, and depending on your specific case, you can also charge for it.
- Repurposing opportunities: Live stream recordings are versatile. They can be edited, repackaged, or divided into shorter segments, serving as promotional material, tutorials, social media content, or even podcast episodes. This extends the lifespan and utility of your content.
Now you know the benefits, here are ways in which you can monetize your own recorded live streams:
Direct methods
- Pay-Per-View (PPV): The pay-per-view method is where you charge viewers a one-time fee to access specific recorded content.
- Subscriptions: Create a subscription model, granting viewers access to a library of recorded live streams for a recurring fee.
Indirect methods
- Sponsorships: Partner with brands or companies to sponsor your content. They can advertise or place products within your recordings.
- Affiliate marketing: Promote relevant products or services, earning commissions from sales generated through affiliate links.
Monetizing and repurposing live stream recordings transforms them into valuable assets. This practice creates an additional income stream, ensures content accessibility for all viewers, and expands your reach.
Put your recorded live streams to work
Recording live streams opens up many opportunities, helping to extend your reach to those who couldn’t attend the live broadcast and paving the way for effective content repurposing and monetization.
WpStream offers an easy-to-use recording setup and automatically stores your recorded content, ensuring it’s ready whenever you need it. Better yet, the powerful plugin extends beyond the essential recording function, with built-in features and options to monetize your stored content, such as pay-per-view or subscription services, being easily accessible.
Ready to see the difference for yourself? Explore WpStream’s features with a free trial today, and see for yourself how these capabilities can improve your content strategy.