Global Subscription Mode
Think of Netflix, Hulu, and Disney+ and how you subscribe to their services. They offer subscription plans and the ability to watch all their content after subscribing. Not to brag or anything, but we have an extra feature. We made it possible so that you have the ability to set up different types of subscriptions and offer VIP access to certain videos. Let me break it down in two scenarios.
Scenario 1:
Alison has a streaming website that broadcasts movies, TV shows, documentaries, news, and fitness videos. She sets up a subscription plan for her viewers to access all her content and pay on a monthly basis.
Scenario 2:
Greg is a teacher and he tutors students in different subjects online. He sets up a website with Maths, Physics, Chemistry, and History videos. He assigns each video and live stream he posts to the appropriate Subscription (subject).This way, his students can purchase the subscription plan of the subject they require help in and not have to pay for access to the whole website.
Now that you have some idea about what opportunities these new features offer your website, let’s run you through how to actually set up these subscriptions.
The first thing you will want to do is download the WpStream Plugin of course.
Once you have successfully installed and activated the plugin, go to WpStream Credentials and either sign in or register if you do not already have an account.
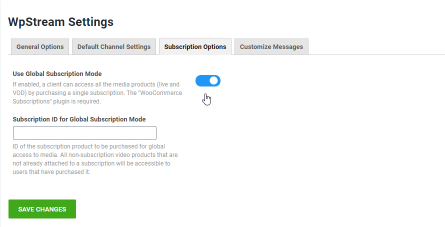
Now, let’s check out what the new settings are by going to WpStream Settings. Here, you will find Subscription Options and Customize Messages. Under Subscription options you will find Use Global Subscription Mode which if enabled, viewers can access all video products on your website if they purchase a particular subscription.
The second thing you will see is the Subscription ID for Global Subscription Mode. Here is where you will paste the Product/Subscription ID of the Subscription plan your viewers will purchase in order to access all content. Under Customize Messages you are able to edit any text that your viewers will see regarding their subscription plans.
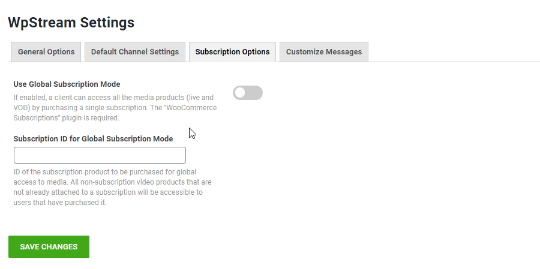
Global Subscription Mode
To find the Subscription ID and enable Global Subscription Mode, you will first go to Products in your WordPress and click on Add New. Now, give your subscription plan a name (All Access) that is straightforward and let’s your viewers understand that by purchasing this subscription, they have access to all your content.
Under Product Data, change from Simple Product to Simple Subscription. Add a Subscription Price and whether this is a Subscription Based Live or not. You can also add a featured image, tags, and categories. Once you are happy with your Subscription Product, hit Publish.
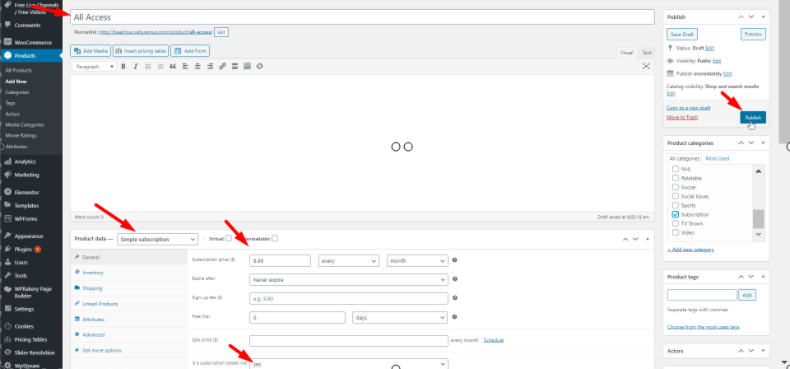
If you go back to Products and hover your clicker over the new subscription product created, you will find an ID right under the name. Copy that ID
Head back to WpStream Settings and then to Subscription Options. Enable Subscription Mode and paste the ID in the Subscription ID section. Make sure you Save your settings before you leave.
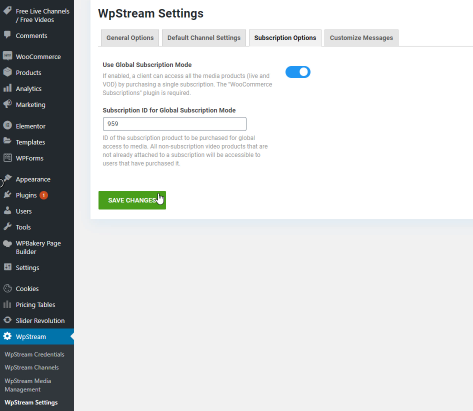
The next thing you will do is add your actual video products. Whether they are live streams or On-Demand videos, you can add these videos to the subscription plan you just enabled globally. Once again, you will head back to Products and click on Add New.
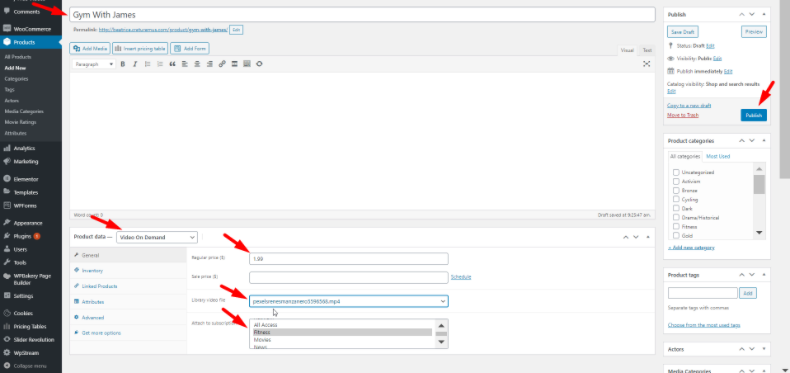
Give your product a name and under Product Data, you can either choose a Live Channel or a Video-On-Demand. For this tutorial, I chose to add a Video-On-Demand but a Live Channel has similar settings. Give it a price and choose the video that you want.
Once you have chosen your video, you will find a list of your subscriptions as well as the option ‘none’. For your Video-On-Demand (or Live stream) to be available to every viewer that has subscribed to your Global plan, either leave this section blank (i.e do not choose any option) or click on none. Once again, you can add your featured image, tags, and categories, and click on publish.
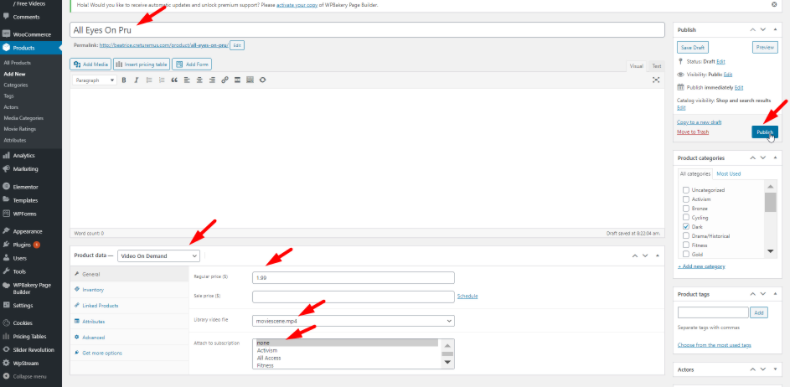
Let’s observe how this subscription performs. Go to your website and check out the video/live-stream you just posted. You will see that you will have to purchase the video before you can watch it.
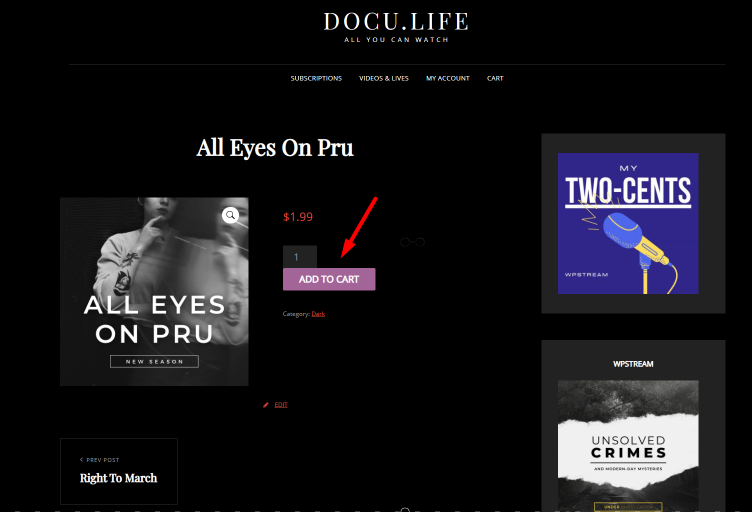
Now, go to where the subscription plan you created is and purchase the ‘All Access’ subscription.
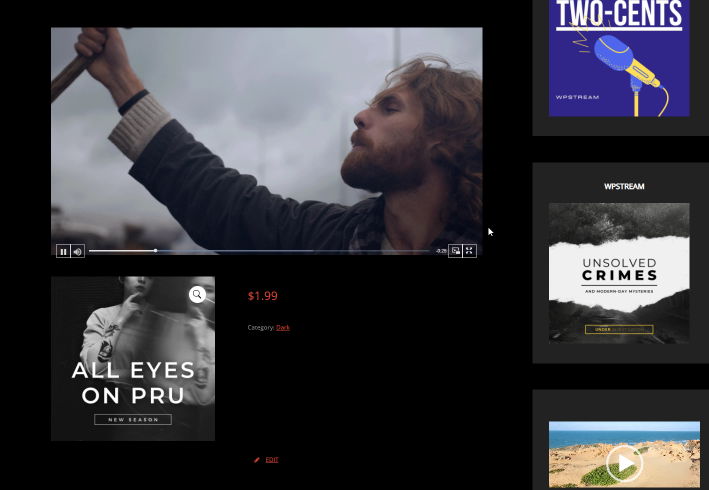
After you have done that, you will have access to the video/live-stream attached to the subscription and if you go back to the video you created, you will now be able to watch it (without purchasing!).
Set up Multiple Subscriptions
The second feature is that you also have the possibility to create different subscription plans and assign videos to each.
First, you will go to WpStream Settings and under Subscription Option leave the Global Subscription Mode enabled and delete the Global Subscription ID. Don’t forget to save your settings.
Now, let’s add another subscription plan by following the exact same steps as above. I created a Fitness Subscription to demonstrate.
Next, add another product (once again, either a Live Video or Video-On-Demand). Give it a price, choose your video, and then attach it to a subscription. Highlight Fitness. Click on publish.
If you check this video on your website, you will find that you do not have access to it and will have to purchase it to watch.
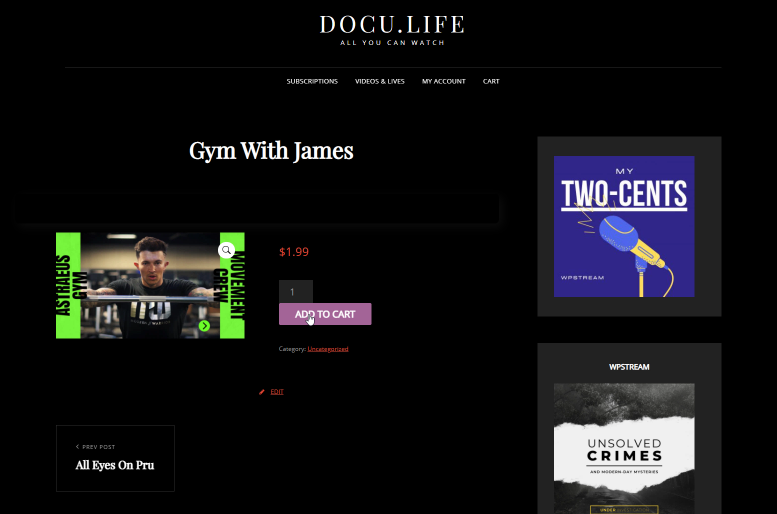
Go to your subscriptions and purchase the Fitness subscription.
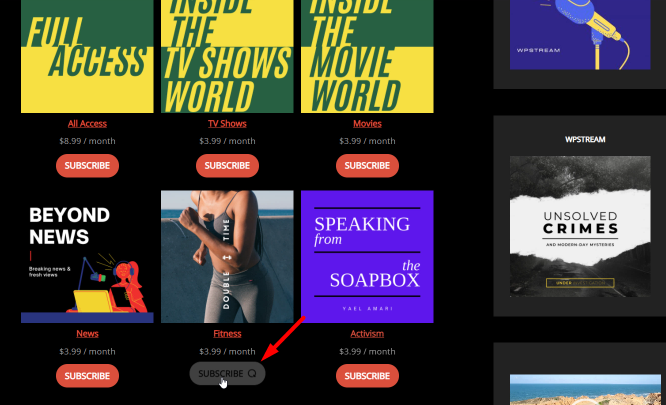
Go back to the video and you will now be able to view it.
You can use this feature to mix and match which videos are only available to certain subscriptions.
Conclusion
You can:
- Create a global subscription so that your viewers have access to all your content
- Create multiple subscriptions that give viewers access to different types of videos
- Mix and match (offer VODs globally and Live-Streams to a different subscription, and many more variations)
- Create an exclusive subscription with access to limited edition content
Who can use this feature?
Absolutely anyone that posts a lot of content, especially if each is different. TV, Podcasts, Vlogs, Radio, Online Courses, Gyms, Churches, Non-profits, Businesses, entrepreneurs, and many more.
Start streaming with WpStream for free today.
Table of Content


