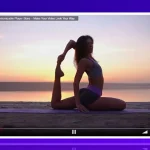
To broadcast from a GoPro to your website is fairly simple and straightforward. Since its foundation in 2002 by Nick Woodman, GoPro quickly became a household name, known for producing some of the best action cameras available on the market today.
GoPro cameras are a top favorite due to their small size and excellent picture quality. With recent technological advancements, these cameras can be placed just about anywhere, including on drones or helmets.
Couple this with the possibility of live streaming platforms such as WpStream and content creators now have a new way of engaging their viewers with action packed videos.
In this guide we’ll go through creating an account on WpStream, creating a channel and the setup necessary to live stream directly from your GoPro camera.
Setting Up Your WpStream Account & Creating a Channel
Setting up an account on WpStream takes under 5 minutes. You can either install the WpStream theme or the WpStream plugin on any site running WordPress. The complete installation guide can be found HERE.
Steps to Broadcast from a GoPro
Step 1: Download and launch the GoPro app on your Android or iOS device. You’ll first see the GoPro app home screen.
Step 2: Press the “Camera” icon from the top left corner of your screen. The camera icon looks similar to the GoPro Hero camera. The Camera options appear, displaying the GoPro cameras connected to your iOS or Android device.
Step 3: Press on the GoPro Hero camera you want to use for your stream. A preview of your camera will appear.
Step 4: Notice the row of icons underneath the video preview. Swipe left until you see the “Set Up Live” button. This button is associated with streaming to Facebook by default, so we will need to make some changes.
Step 5: See the small “Facebook” icon in the right corner bottom of your device screen. Now press the button and you will see the Live Stream Destination screen, with options for RTMP, YouTube and Facebook.
Step 6: Select RTMP from the list of options. This will return you to your GoPro video preview screen, with a small difference – the RTMP icon will be displayed in your lower right corner.
Step 7: Go to your WordPress website and create your channel. Then press the “Set Up Live” button and add your URL in the necessary field.

Please note that you will have to use the following format when adding the Stream Server URL: URL + / + Stream Key.
For Example: rtmp://xx.xx.xx.xx/wpstream/[streamkey]
Step 8: Pick a streaming resolution
Step 9: Choose save settings for your stream. You can save a high resolution copy of your video on the GoPro’s SD card.
Step 10: Press the ‘GoLive’ button to start your stream.
Conclusion
GoPro cameras offer content creators the possibility of creating engaging, high quality videos for their intended audience. Setting up your broadcast from a GoPro to your WordPress website with WpStream is easy as 1-2-3.
Table of Content


