1. What is Twitch and what are gaming live streams?
Game live streams are amongst the most popular types of live content. We may thank Twitch, which is a live streaming video platform first launched in June 2011. Since then, Twitch has gained immense popularity with more than 2.2 million monthly broadcasters and well over 15 million daily active viewers. While Twitch is one of the biggest players in the streaming industry, they are not alone – website owners from all around the world are moving to live video content which can be monetized with ease. Find out how you can set up your Twitch website and start gaming live streams.
Table of Contents:
- What is Twitch?
- What Type of Platform
- Requirements and Development
- Twitch Features
- WpStream Features
- Installing the Theme & Plugins
- Monetization Options
- Allow gamers to live stream on your site
2. What Type of Platform?
Before starting to work on your very own Twitch-like website and having gaming live streams, you will have to decide some things from the get-go. Here are a few examples:
- Do you want to be the only streamer?
- Will users be able to have their own channels?
- Are you going to implement a chat system?
- If users have their own channels, will you charge them per channel or monetize your website in other ways?
3. Requirements & Custom Development Costs for Gaming live streams
Building your own Twitch-like platform from scratch via custom development can get quite expensive. Twitch is a massive platform with plenty of features and customization options. Let’s say you want to have your website built by a developer or team of developers. Building the website would have to be done in several important stages. But let’s take a look at some cost estimates: How much would it cost to develop a live streaming website similar to Twitch?
- The pre-development stage – here you will prospect the market to create your business model
- Building a prototype according to your specifications – this can take around two weeks, or approximately 80 hours of development work.
- Design for your website – more than 2 weeks or 80 hours as a minimum
- Development for video streaming website – at least 660 hours to create a well functioning platform
- Support after launching your website – this is a must for any website and it could add up to 16 hours a month or around 200 hours for a full year.
- Post-launch development – adding new features to your website should be estimated separately.
The total cost of development depends on several factors, including:
- The scale of your project
- The hourly rate of your development team
- The technology used for your project
The hourly development rate can vary greatly depending on the agency you pick and the number of developers hired. The minimum cost for a website similar to Twitch can be anywhere between $30.000 and $80.000, with an additional ~$5.000 per year for after-launch support.
4. Twitch Features
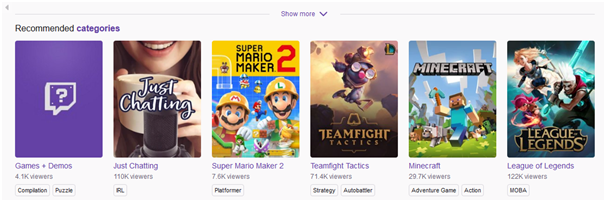
Twitch became widely popular for allowing users to start their own streaming channel and for offering customization options for their users. Visitors are also able to create an account, add favourite streamers, customise their profile and socialize in the channel’s chat room. The Twitch.tv is intuitive and user friendly, with popular categories being displayed directly on to the home page:
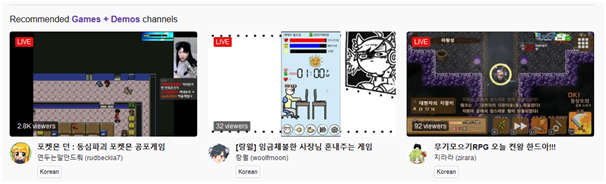
Popular channels are also showcased directly on the home page, which means visitors are very likely to find a stream they are interested in quickly:
Below you will find a guide on how to create your own website with WpStream and how to implement the same features visitors love from Twitch.tv.
5. WpStream Features
The WpStream theme offers the same features with the use of WpBakery Shortcodes:

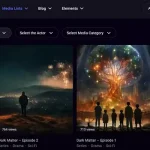
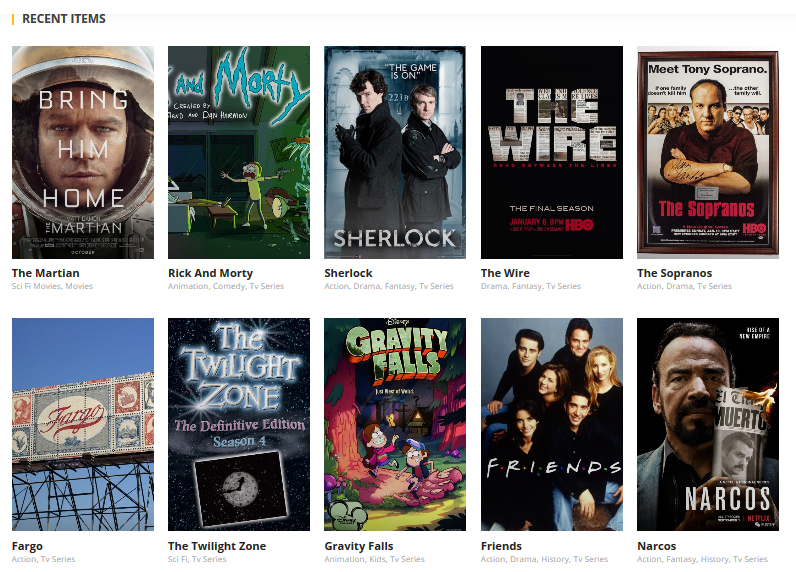
Recent items shortcode can be added on the homepage:
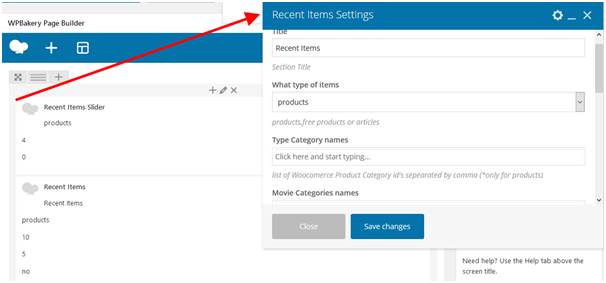
This shortcode appears on the homepage like this:
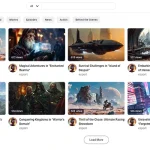
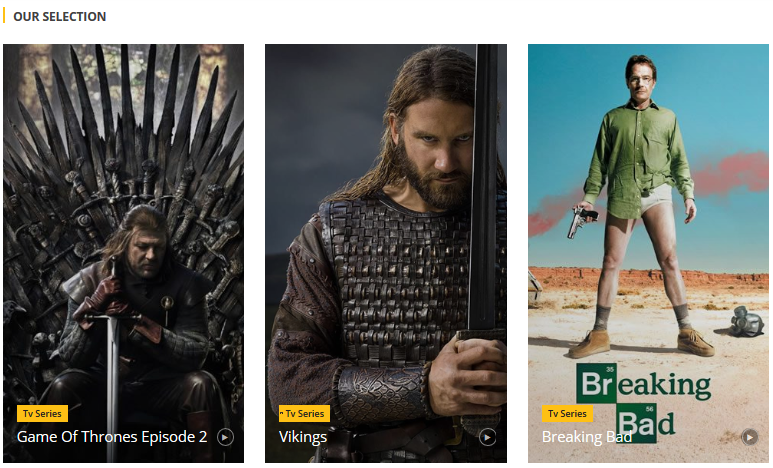
Featured products can be showcased in different ways:
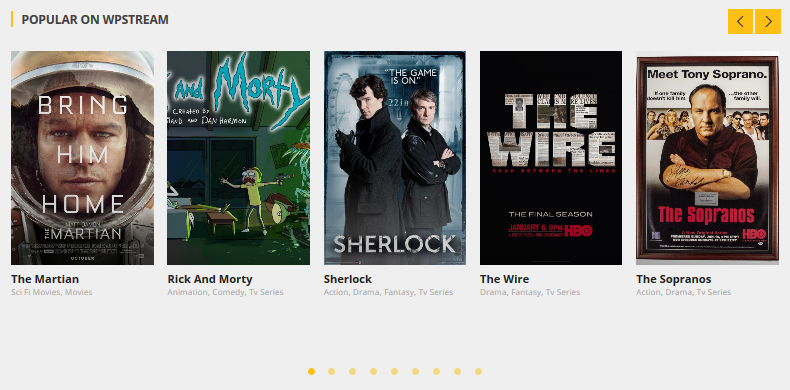
Recent items sliders can also be used for recommended or popular channels:
Articles and blog posts can also be featured on pages, by using shortcodes:


With the release of WpStream version 1.1.1, we are giving webmasters the option to allow regular users to stream their own live content or videos on one free channel. This feature is recommended for websites or webmasters who want to add a new layer of interactivity for their users. Sports betting websites, gaming websites and DIY websites can use this feature to promote their users’ content with just a few clicks.
Requirements
To set up your very own Twitch-like website, you will need to have a running WordPress website and a WordPress Streaming theme, along with a few optional plugins:
WpStream Theme – this theme is available HERE for free
WpStream Plugin – this plugin is mandatory and works with the theme
WooCommerce Plugin – this optional plugin offers the possibility of monetization for your website
6. How to Install WpStream & Plugins
Installing WpStream and setting up your website takes under ten minutes. Here is a step-by-step guide on how to do it:
Install WordPress
Most web hosts can install WordPress automatically but you can also do it manually. Guides on how to do it can be found below:
Now that we installed WordPress on our website, we need to set up our WpStream account and install the WpStream theme.
Creating your WpStream Account
You will first have to visit https://wpstream.net and click on “My Account”, then fill out the register form, as shown below:
With the form filled out, simply click on “Register” and you will be redirected to the dashboard page shown below:
Installing the WpStream Theme
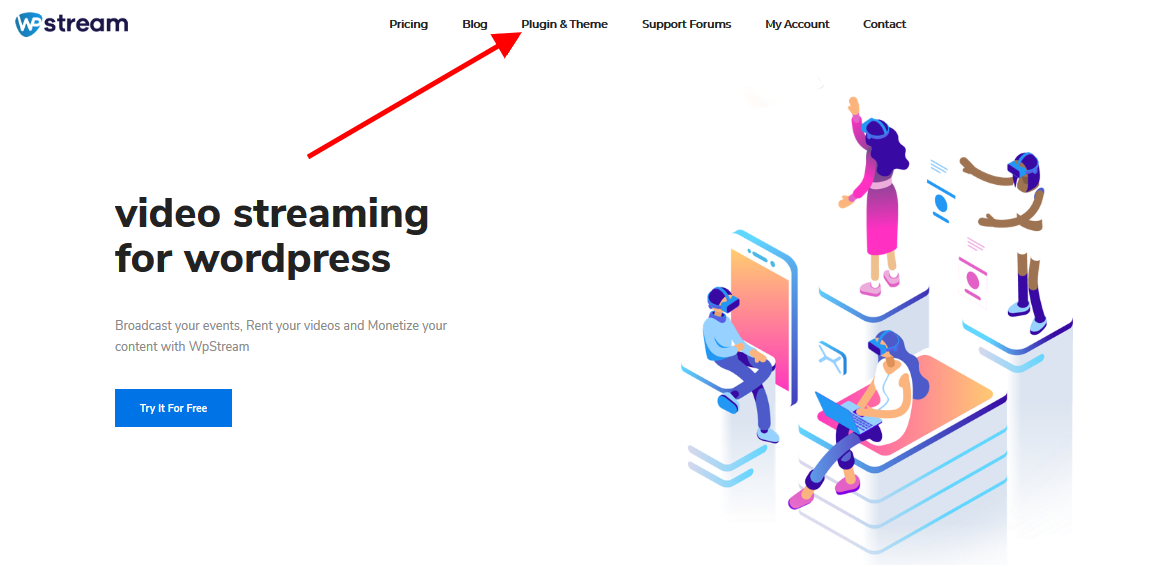
Now that we have our WpStream account set up, we will have to download our theme. Visit https://wpstream.net and go to “Plugin & Theme”.
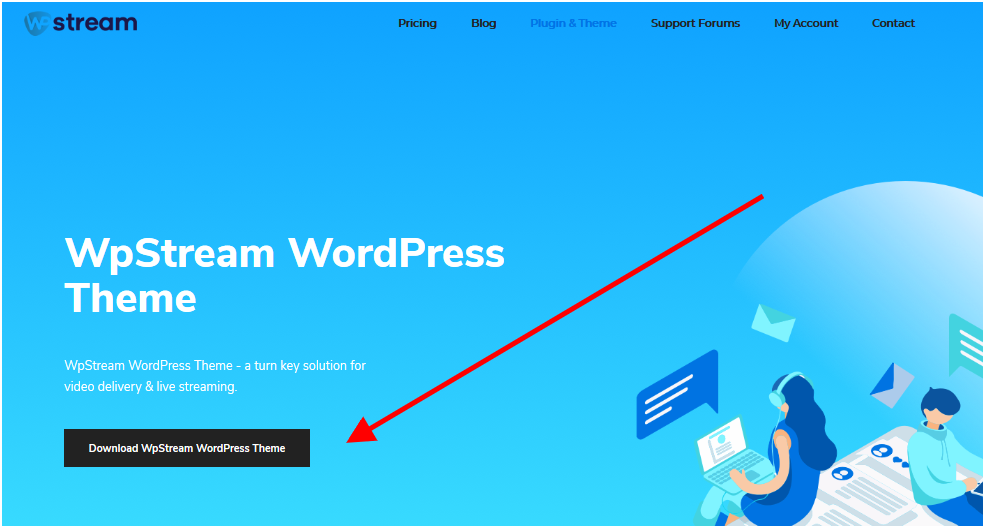
Click on “WpStream WordPress Theme” and you will go to this page: https://wpstream.net/wpstream-theme-a-live-streaming-wordpress-theme
Now simply download the theme by clicking on “Download WpStream WordPress Theme”.
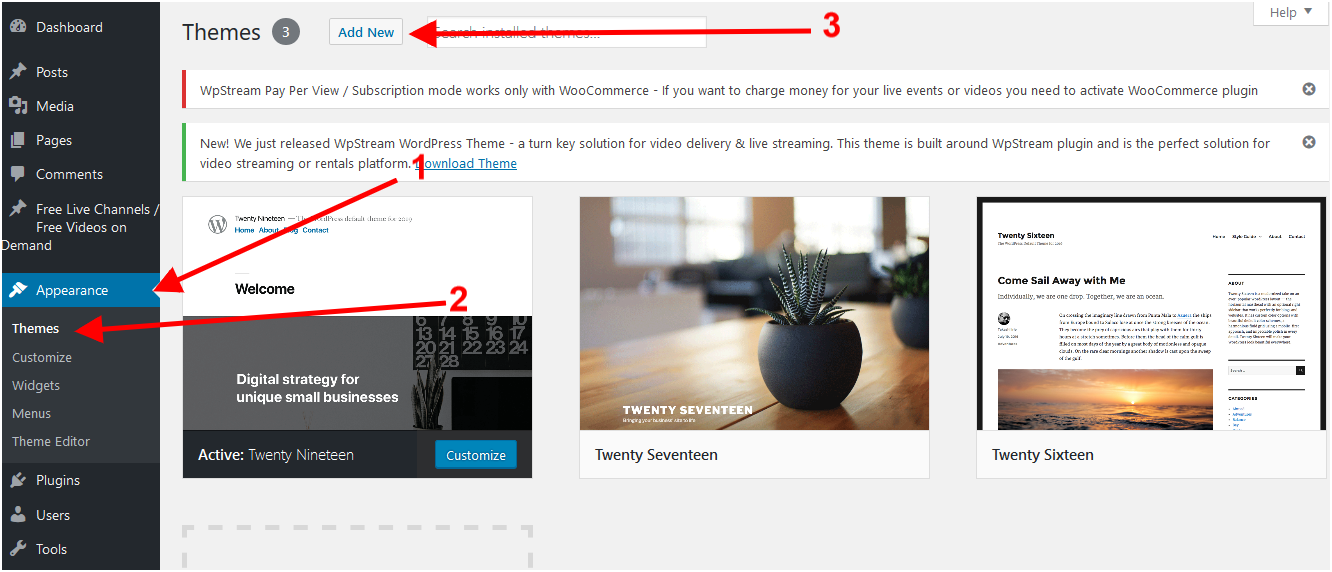
The WpStream theme can be installed by going to your WordPress dashboard, then “Appearance” and then “Themes”. Click on “Add New” and then “Upload Theme”
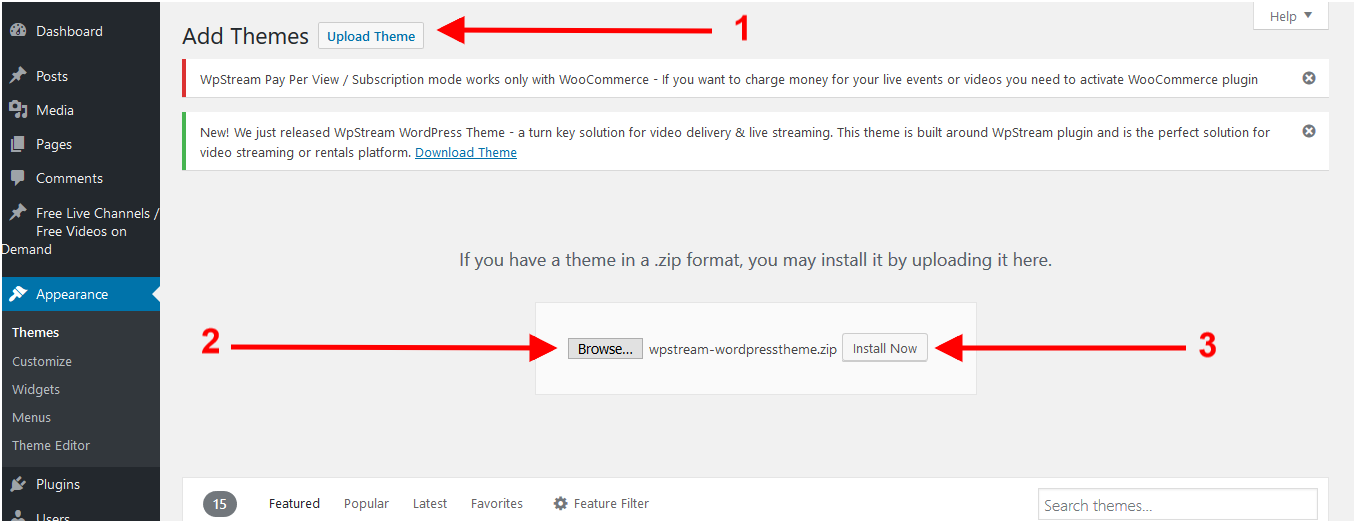
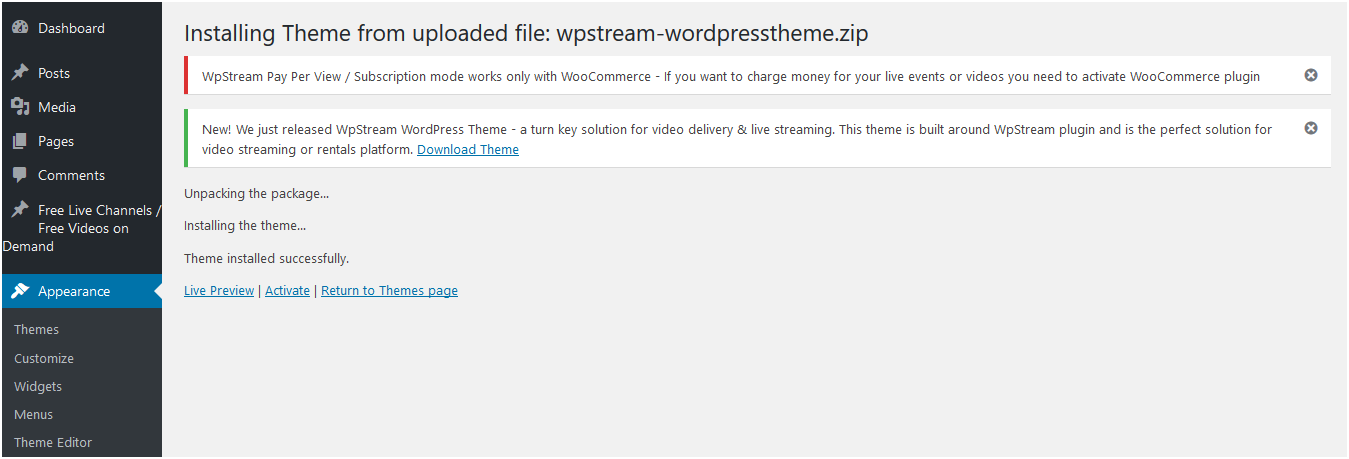
Click on “Upload Theme” and then on the “Browse” button before selecting the theme you downloaded. The theme file name is “wpstream-wordpresstheme”. Select this file and click “Install Now”.
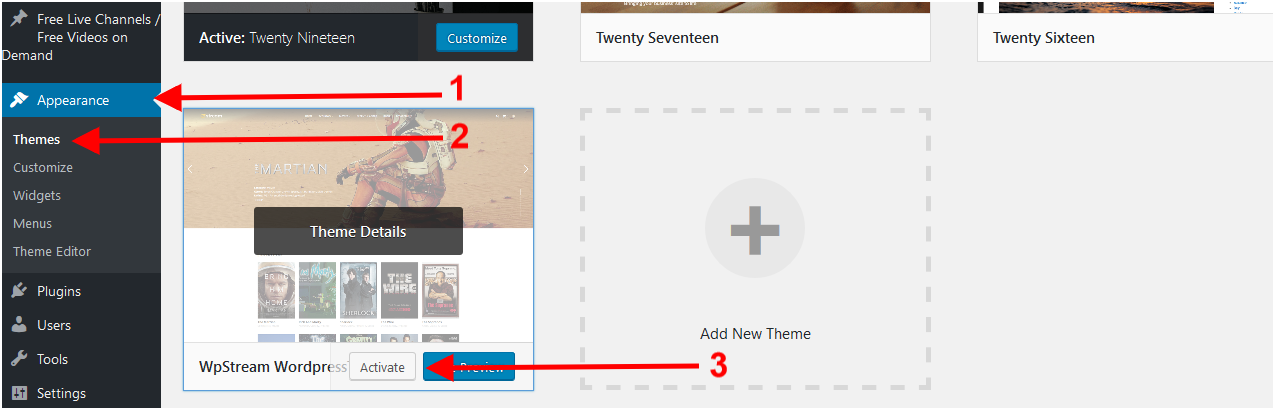
The theme was installed successfully. Let’s activate it by going to “Appearance” then “Themes” and clicking on “Activate”.
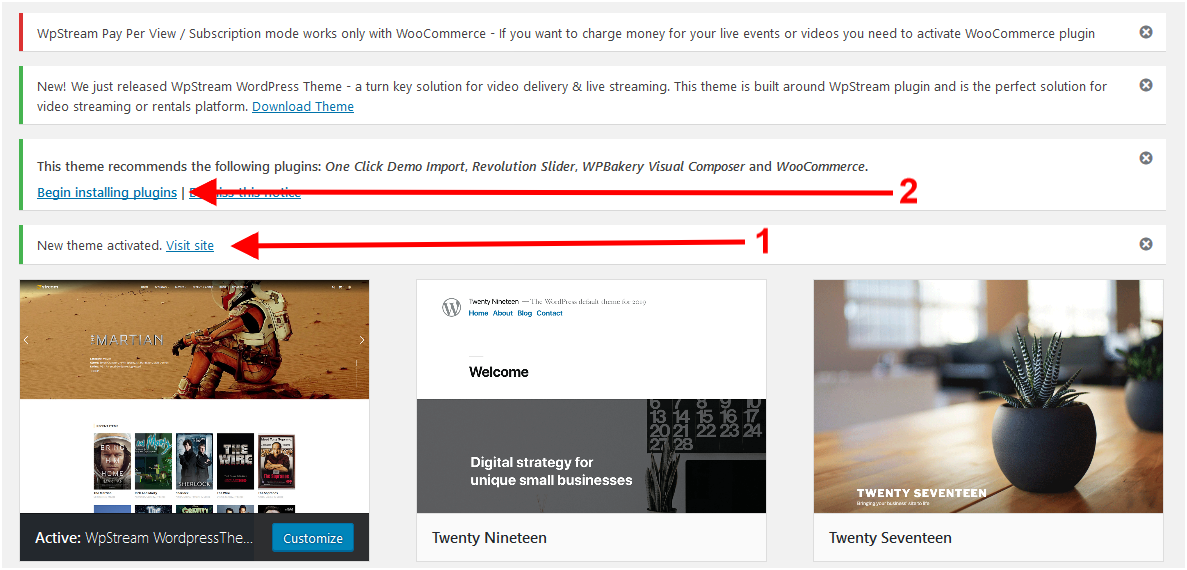
The theme has been activated and is ready to use. We still need to install the mandatory and recommended plugins. Click on “Begin Installing Plugins”.
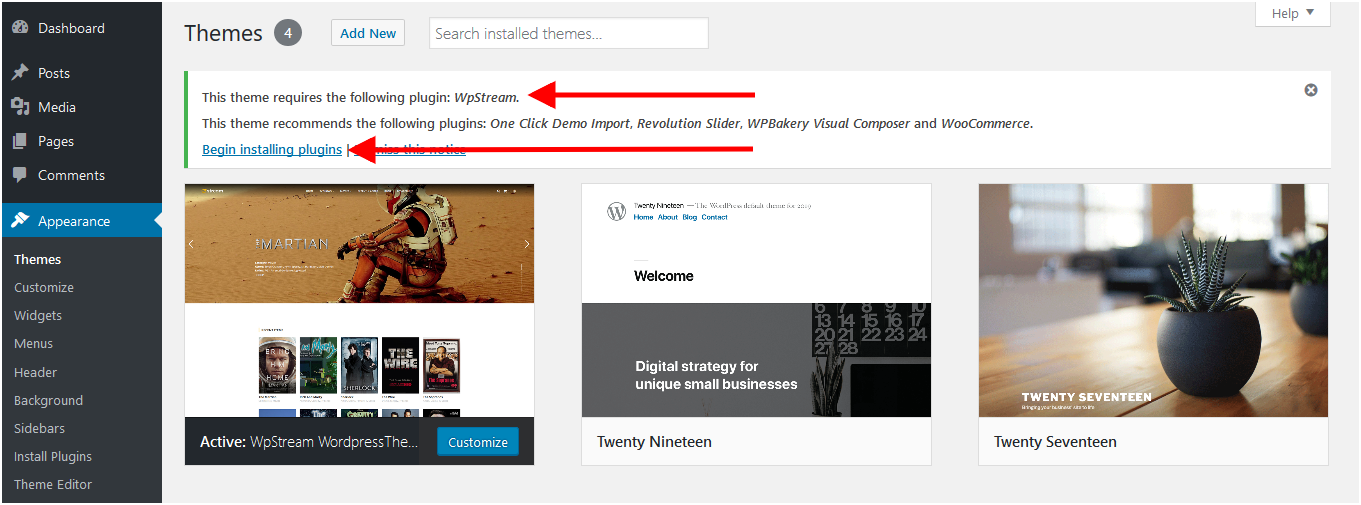
WpStream Theme required plugins include:
- WpStream Plugin – this plugin is mandatory for the WpStream theme.
- Revolution Slider – this is a third party Premium Plugin used for header sliders.
- WPBakery Visual Composer – this third party Premium Plugin used to edit pages and insert WpStream-related shortcodes
- Other optional plugins include “One Click Demo Import”, “WooCommerce”and “WooCommerce Subscriptions”.
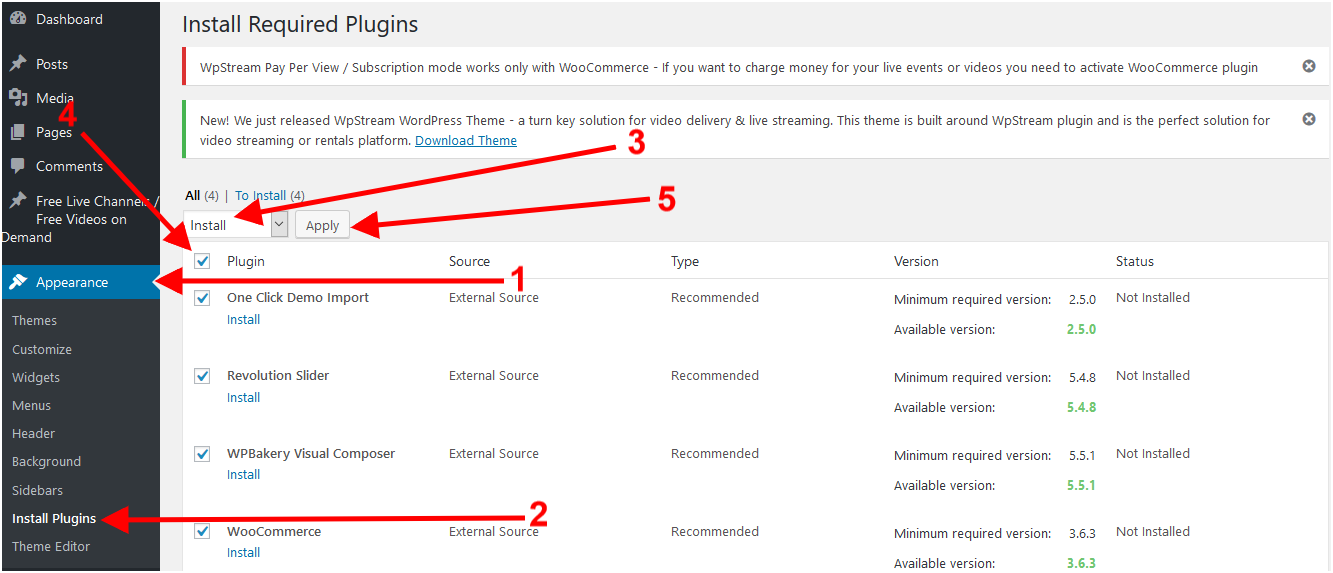
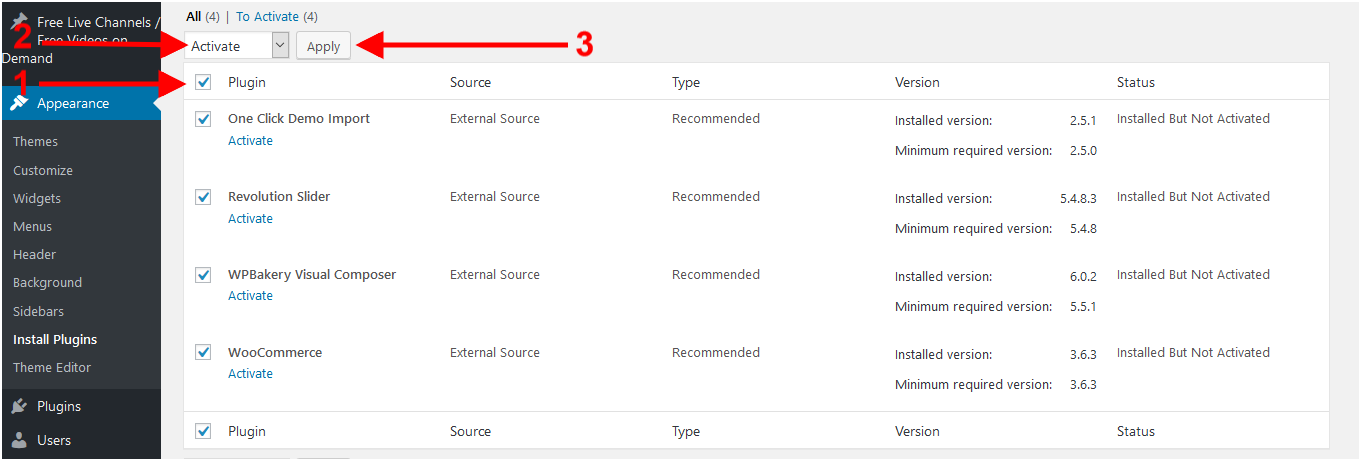
Installing the plugins can be done by going to “Apperance” and clicking “Install Plugins”. Go to “Bulk Actions” and select “Install”. Now all you have to do is select the plugins you want and then click on the “Apply” button.
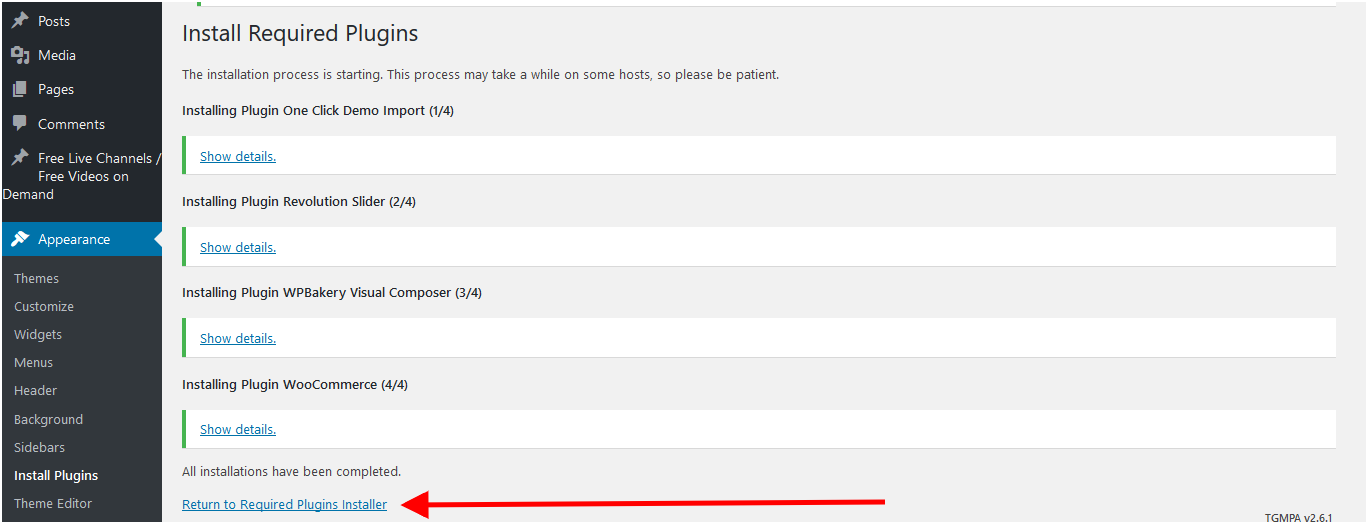
After the plugins are installed, click on “Return to Required Plugins Installer”.
Now it’s time to activate our plugins. Select the plugins from the checkbox and then go to the “Bulk Actions” dropdown and select “Activate”. Now click on the “Apply” button.
Activating the plugins may take a few minutes, so be patient.
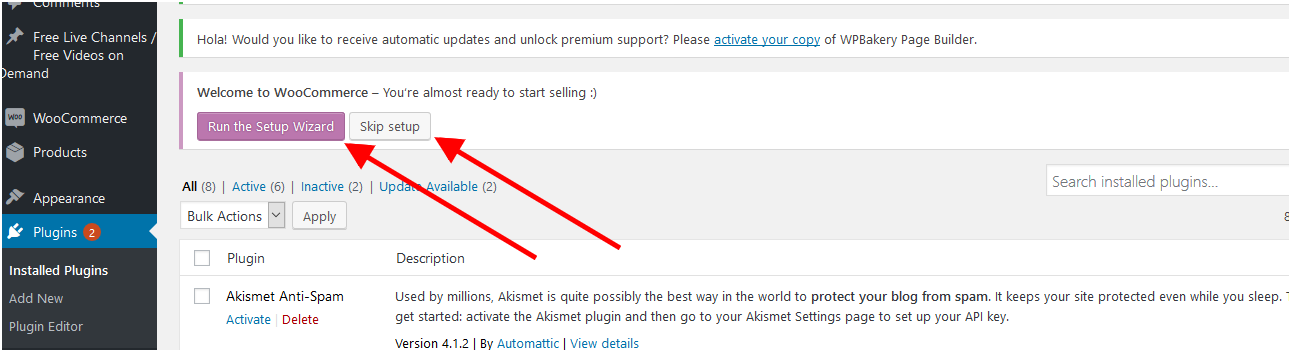
Once the plugins have been activated, this message will appear:

If you also installed the WooCommerce plugin, you will have to set it up as well by clicking one of the two buttons found in the screenshot below:
If you ever get stuck, check out our video tutorial – it’s available HERE
Linking Your WpStream Account & WpStream Plugin:
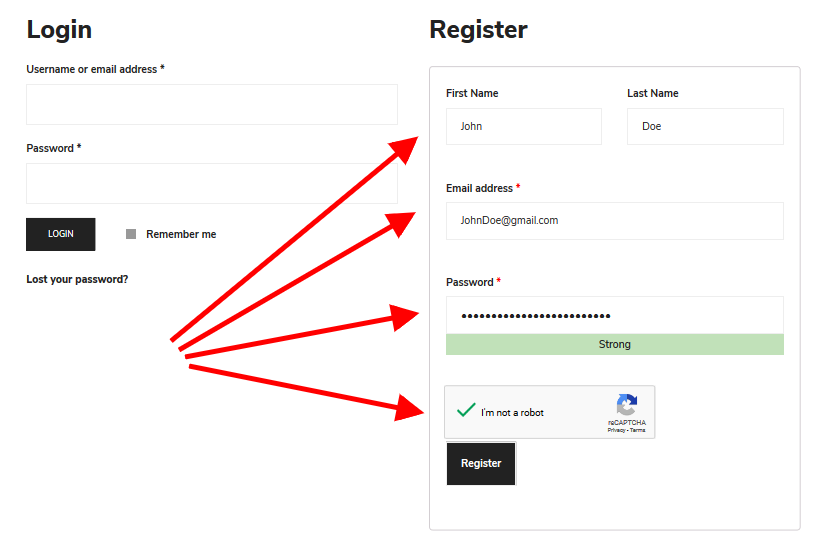
You will first need to create an account on WpStream.net. Visit WpStream.net and go to “My Account” and then fill out the registration form:
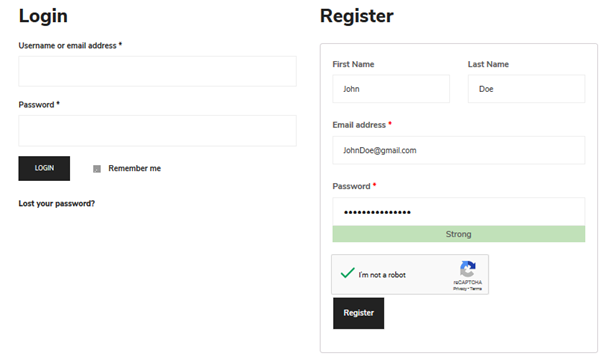
Please remember your registration details (username or email address and password), as you will have to use them shortly.
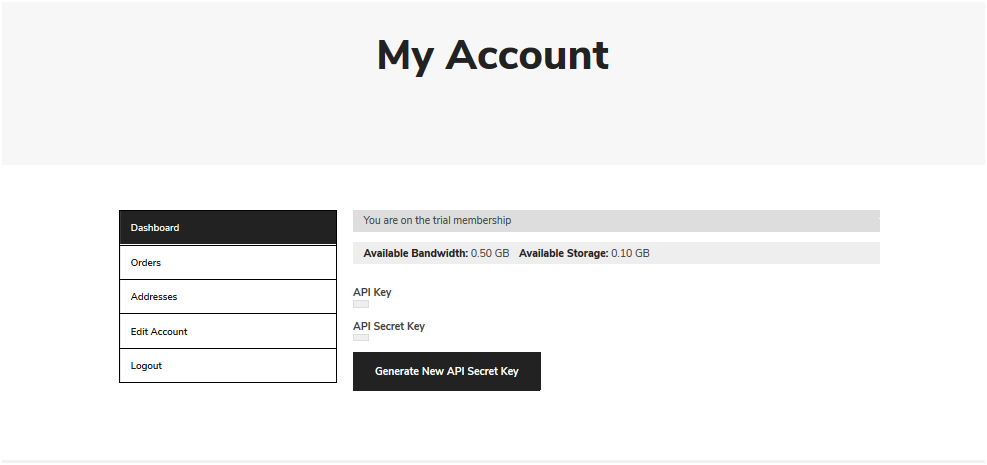
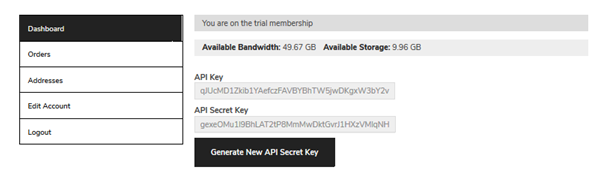
Once you logged in, you will be redirected to your user dashboard where you will see your current package, available storage, available bandwidth, as well as other details:
Now it’s time to link your WpStream account to your website. Go to your WordPress dashboard and click on “WpStream”, then “WpStream Options”.
Here you will add your WpStream credentials:
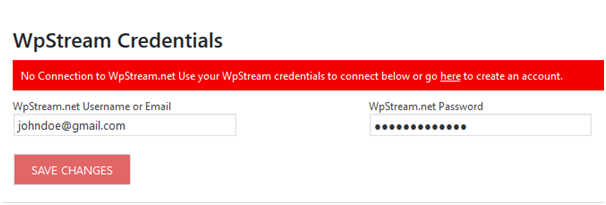
Click on “Save Changes” and your account will be connected to your website.
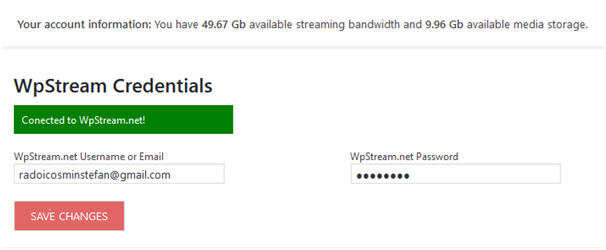
You can also see your available storage and available bandwidth in this window.
How to Enable Streaming for Regular Users :


[Update May 2021: Note that you no longer require the WpStream theme to enable regular users to broadcast. You just need the WpStream plugin. See Point 8 below]
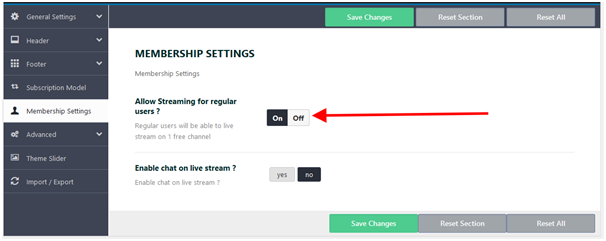
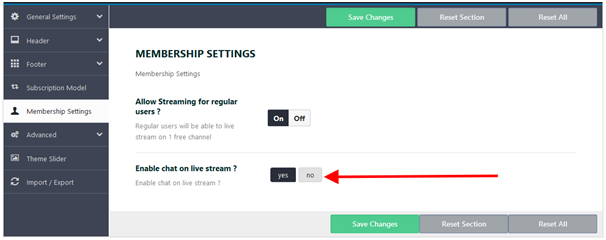
Activating “Twitch” mode is done from Theme Options > Membership Settings. Here you have the option “Allow Streaming for regular users”. Set this to “On” and you’re good to go.
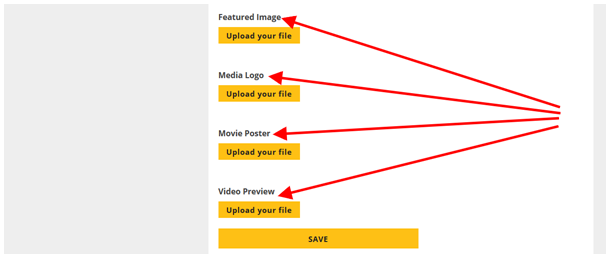
When users log in to their account, they will have a different dashboard tab called “Events”. Here they will be able to add their channel name and description as well as other details such as trailers and logos for their free channel:

With your website now running in “Twitch” mode, your users can also benefit from their very own chat screen where they are an admin. You can enable this feature from Theme Options > Membership Settings and setting “Enable chat on live stream?” to “Yes”.
Video Tutorial is also available below:

7. Monetization Options
Before building your website, you will need to think about how you will monetize gaming live streams. With the WooCommerce and WooCommerce Subscriptions plugins you have several options available:
- Pay Per View subscriptions – website visitors will have to pay before watching a stream
- Membership subscriptions – website visitors can pay a monthly or weekly fee to have access to all of your website’s content
- Streamers fee – streamers can pay a fee to host their content on your website
- Displaying ads – your website will display different targeted ads
no one:
gamers finding out GTA 6 will launch in 2025: pic.twitter.com/JLcENcz9tl— WpStream (@streaming4wp) June 30, 2021
Table of Content