With the VOD industry gaining popularity among content producers and consumers, content creators and entrepreneurs are wanting to create a netflix-like website. Original content creators are shifting from giant VOD providers such as YouTube or Vimeo due to copyright issues, ownership, and control. This article is a tutorial on how to create your own Netflix-style WordPress website.
Prerequisites
You will have to follow our previous guide on installing the theme and importing demo content before continuing. The complete guide can be found here. When importing the demo content, make sure you import the Hollywood Demo, focused on Videos On Demand, and not the GoLive Demo, which is built around live sports streaming. If you would like to find out how to create subscription plans like on Netflix, check out this video tutorial.

WpStream “Hollywood” Demo Features & How To Build Them
To create a Netflix-like website and a similar homepage is really easy to do with WpStream. Let’s take a quick look at our “Hollywood” demo and see all the different elements from the homepage.
- Header Slider

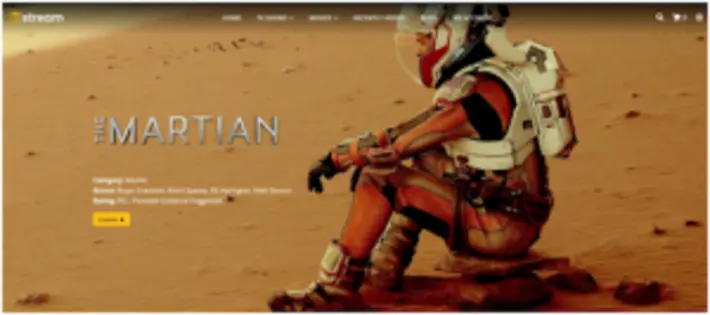
Adding a Header Slider
To add a header slider, simply edit your home page with WpBakery and then go down to “Appearance Options”. Here you will have to select “Theme Slider” from the “Select Header Type” dropdown.
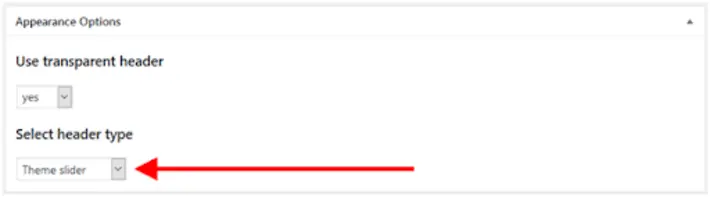
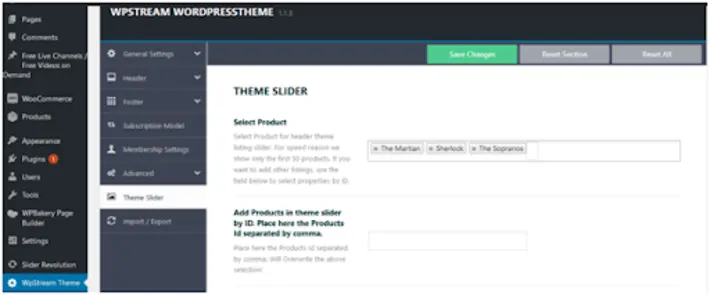
You can also edit the Theme slider from Theme options:
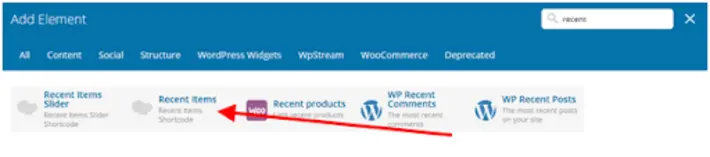
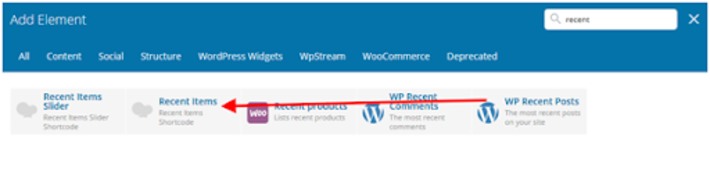
2. Recent Items
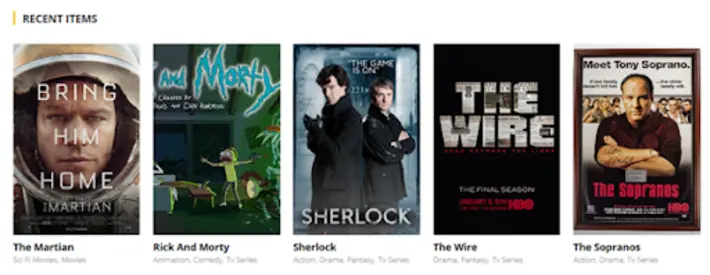
Adding Recent Items
To add recent items to your home page, simply edit the page with WpBakery and add the “recent items” shortcode:
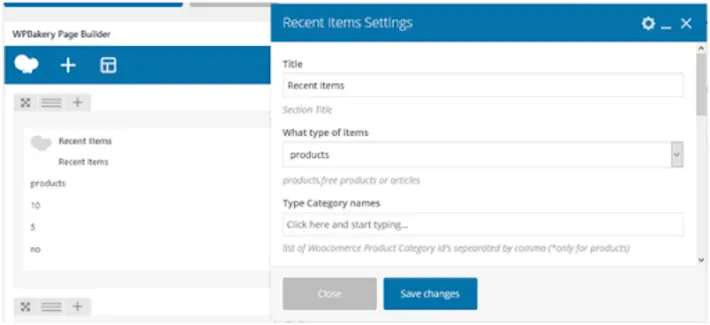
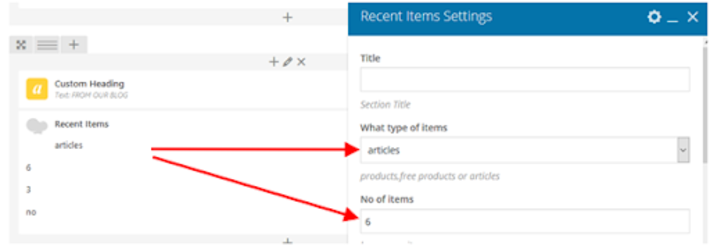
You can also edit the “recent items” shortcode and select what type of items or products you want to display by category, actors, ratings, and the number of items you wish to display:
-
Call To Action
Adding a Call To Action
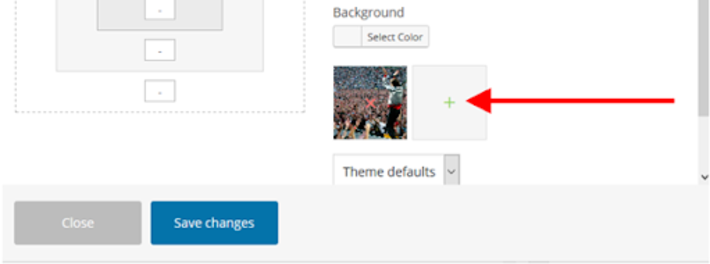
To add a similar call to action on your homepage, you will first have to add a new column and go to “Design Options”. Here you will have to add a background image for your column:
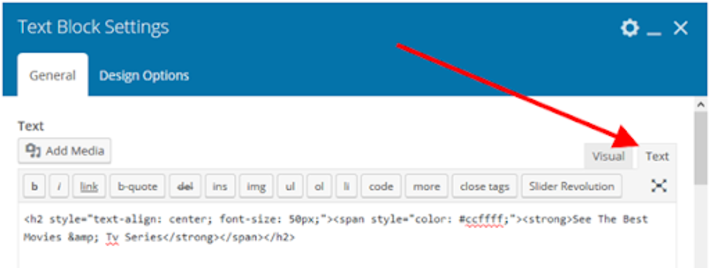
Next, you will have to add a text block to your column. Extra appearance details can be added to the text block from the text editor:
Here is our text block code for reference:
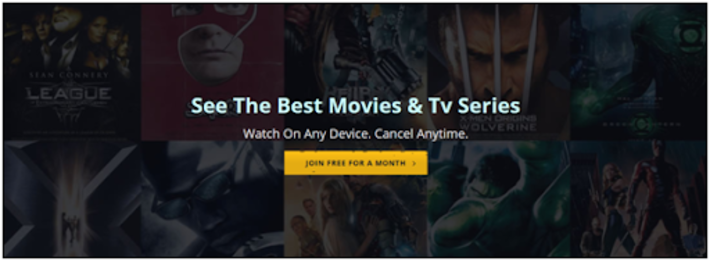
See The Best Movies & Tv Series
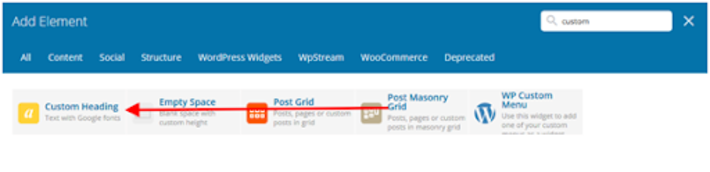
It’s time to add a subheading. Use the “Custom Heading” shortcode to do this:
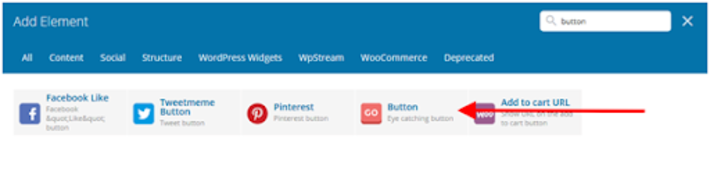
To finish off, simply add a “button” to your call to action segment:
-
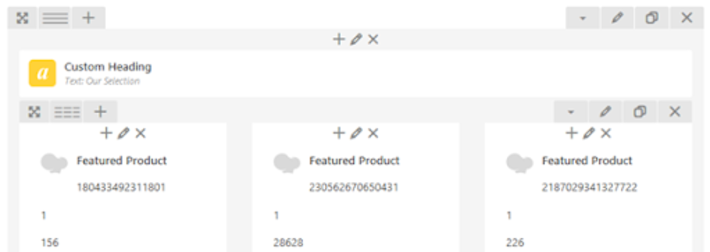
Featured Products

Adding Featured Products
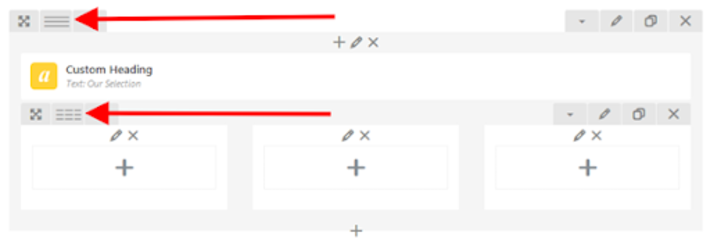
To add featured products, you will have to edit the “column width” and keep the heading as “full width” but divide the second row into three equal columns:
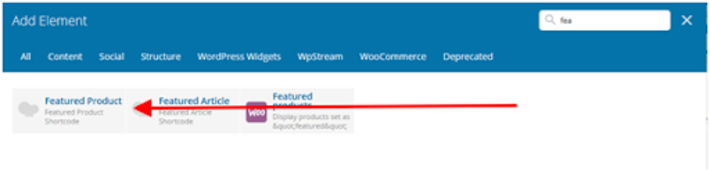
Then, add the featured product shortcodes:

You will have three featured product shortcodes on the same row, with a custom heading shortcode above:
-
Product Slider
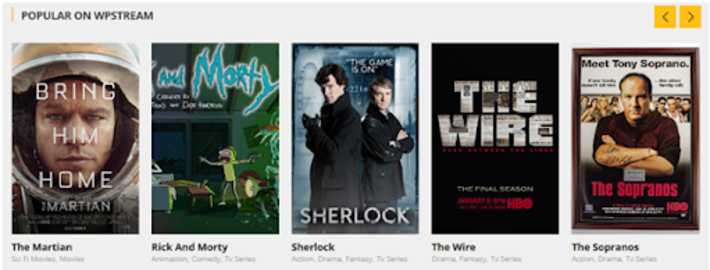
Adding a Product Slider
To add a product slider with a custom heading, you will have to first add a “custom heading” shortcode:
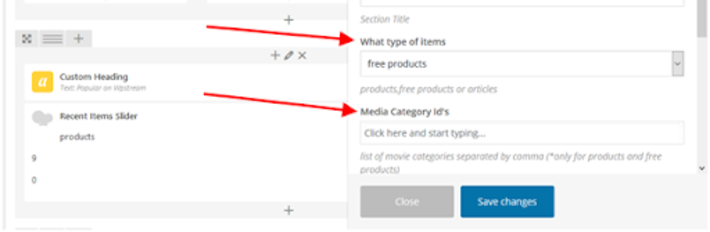
Add the “recent items slider” shortcode:
You will also be able to set which types of products will be displayed, the number of products or products from different categories:
-
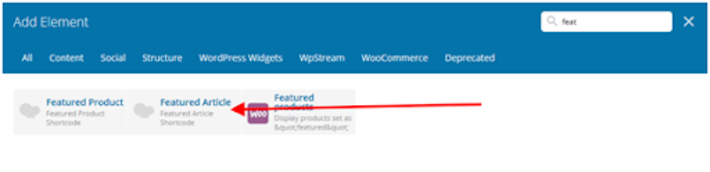
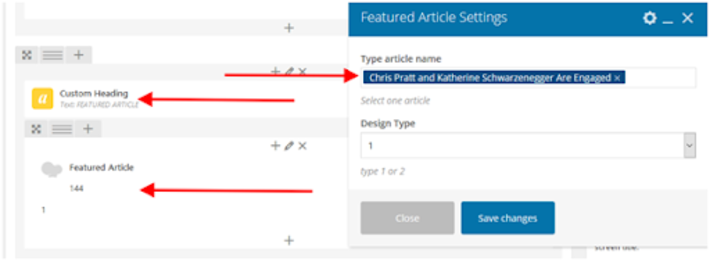
Featured Article
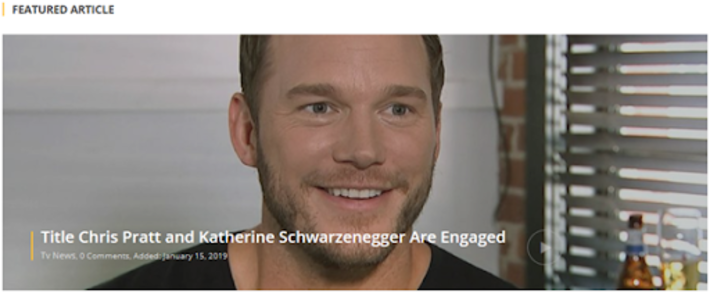
Adding a Featured Article
Adding a featured article is done with the “featured article” shortcode:
You can also add a “custom heading” before your featured article. The featured article needs to be set by name, not by page ID, as shown below:
-
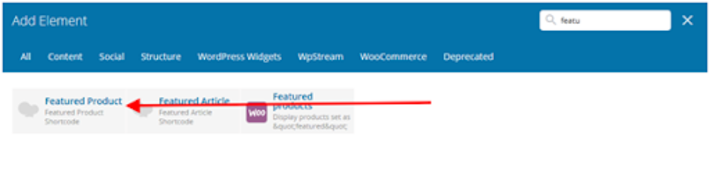
Featured Product Type 2

Adding Featured Product Type 2
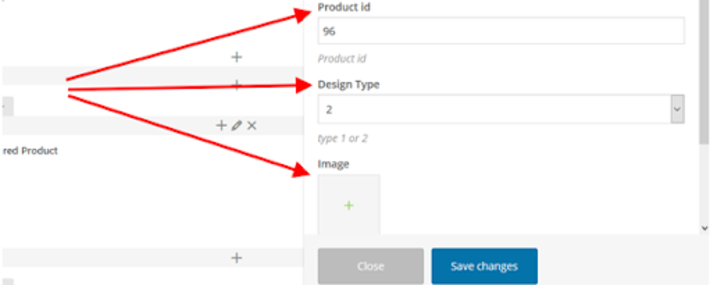
Adding a full width featured product can be done with the “featured product” shortcode:
After adding the product, you will have to add a “product ID”, set “design type” to 2 and add a background image:
-
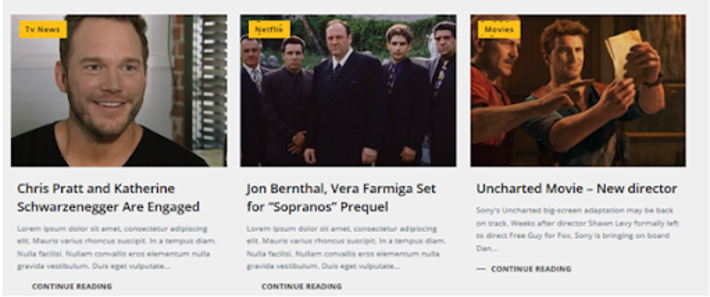
Category Slider

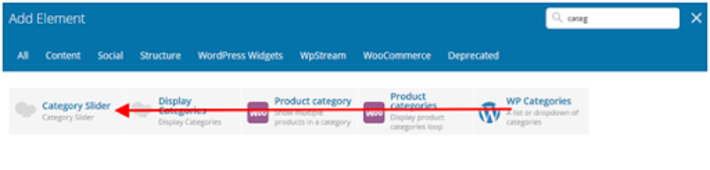
Adding a Category Slider
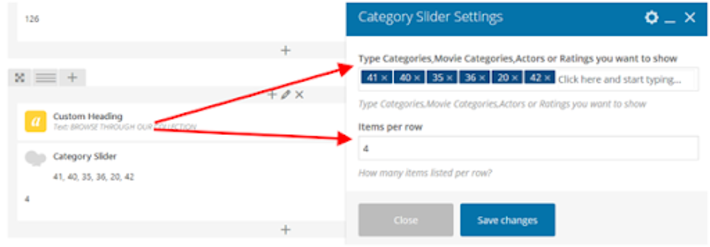
Adding the category slider is done much in the same way as a product slider. Search for the “category slider” shortcode and add it to the home page:
You will have to add the category IDs you want to be displayed, as well as the number of categories to display per row:
-
Recent Blog Articles
Adding Recent Blog Articles
Recent articles are added with the “recent items” shortcode:
But instead of “products”, we will switch it to “display articles”:
You can also set the number of items to display.
Setting Up Your Subscription Model to Create a Netflix-like website
At the moment, you have your homepage looking just the way you want it to, it’s time to change your subscription settings. Begin by going to the “WordPress dashboard”, then “theme settings”, and finally “subscription model”:
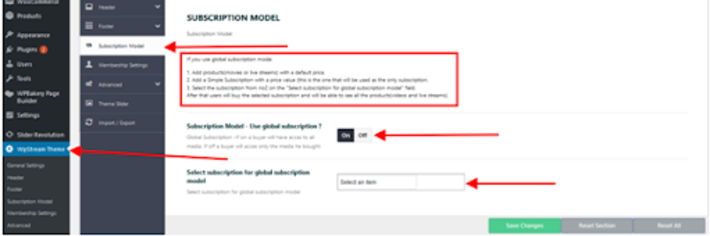
Above, we can see a set of instructions; 1 to 4 and the option to “use global subscriptions”. We will set this to “On”. Under it, we have the option to select our subscription but no options are available at the moment. Add a simple subscription product by going to “Products” and click on “Add New”.
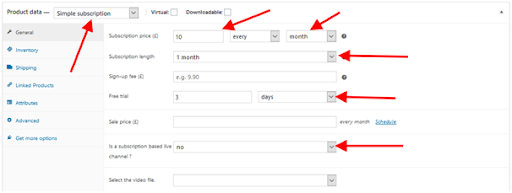
On the new product page, go to the “Product Data”. You will have to add a “regular price” and “Sale price”. Under “is a subscription based live channel” select “No”. You will not be required to select a video file at this point. Add any other details for your product (including a name), then hit “Publish”.
Return to theme options and check if you can select a subscription:
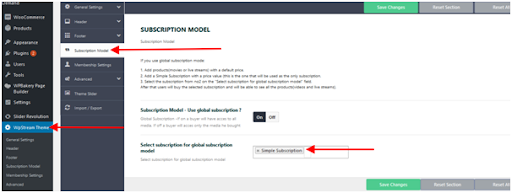
Once you can select the subscription we just created, users will now have to pay a fee to get access to all the content on our website.
Subscription – User POV
Once your videos are in place and your subscription is set, let’s see how it looks from the user’s perspective.
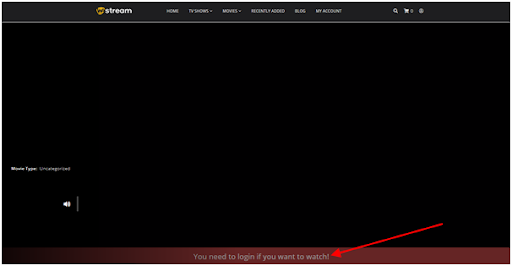
When viewing the product page, you will see a notice saying that you need to login to your account before watching the subscription-based video.
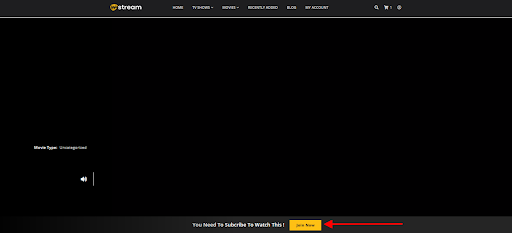
After logging in, a notice appears that you are not currently a subscriber. Click on “Join Now”.
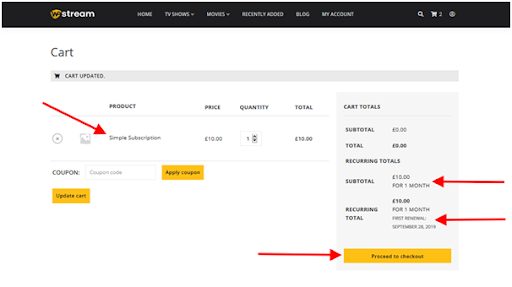
After clicking “Join Now”, you will be redirected to the cart page which displays the subscription you are about to buy and details such as subscription length when renewal will be required. Click on “Proceed to Checkout”.
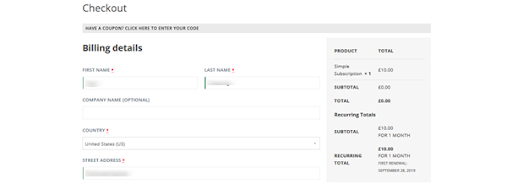
Users will have to add their billing details and choose a method of payment.
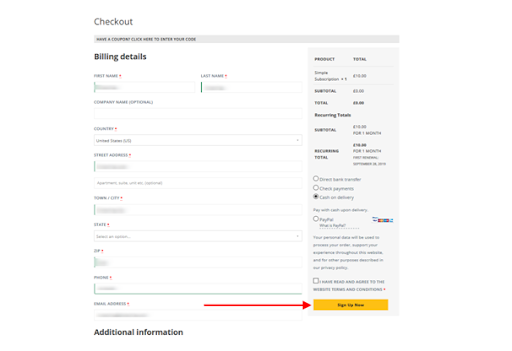
After filling in the details, simply click on “Sign Up Now”.
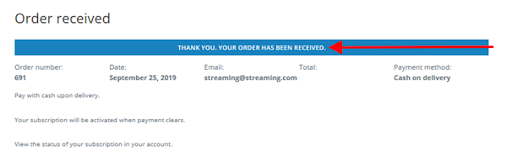
The user will then receive a confirmation that their order has been placed.
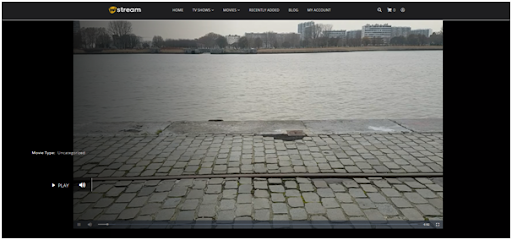
If you go back to the video, you are now able to see it, and every other video on the website.
Conclusion
The WpStream Platform offers content creators plenty of flexibility when building, managing and customizing their website. With full WooCommerce integration, monetizing your videos on demand is easier than ever before to create a Netflix-like website. Subscription packs are considered more economic for your viewers and for you as a site owner. For the viewer, they will be paying a lower price compared to “pay-per-view”, and for you as a site owner, you will have more consistent and loyal customers coming back on a monthly basis.
Start your video streaming journey with WpStream and enjoy the multiple monetization options available. Register and start for free- no credit card required.
Table of Content