Updated February 17th, 2026
Multi user streaming via the Hello WpStream Theme.
About the feature
This feature allows your streamers on your website to go live through the Front End (not in wp-admin area), meaning that users who are not administrators can now independently broadcast videos.
We have added a new shortcode, WPBakery block, and Elementor widget. All these items are backed by the same code so their behavior is the same.
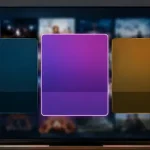
To begin, you must first head to WpStream ‘Settings’ in your WordPress admin:

There are 3 new settings here:
Extra Roles
From a list, you are now able to pick the roles of those whom you allow to broadcast. More specifically, if you would like your Editor, Author, Contributer, etc. to be able to create a channel and go live.
The type of channel
Until now, only Administrators were capable of creating free or paid channels. Other users were unable to set up a channel (free or paid) to broadcast. Because of your requests and feedback, we have made it possible for the plugin to auto create one channel for each user. This setting allows you to choose the type of channel created – free or paid (alternatively, they can also have one free and one paid channel).
Default Price for streamers on your website
There is a default price that a paid channel will have upon creation. Only the administrator is able to change the price of this channel.
After you go through the above settings you can move on with the implementation of the Front-End streaming.
3 ways to do this:
- Classic WordPress Shortcode – [wpstream_go_live id =””] – if you leave the id blank, the plugin will auto discover the id of the first channel that belongs to the logged user and will automatically use that. If you add an id, the plugin will start broadcasting over that id.
- Visual Bakery – there is a new block called ‘WpStream Start Streaming’ Button. You will have an id parameter that acts as explained above.
- Elementor – there is a new widget called ‘WpStream Start Streaming’. You will have an id parameter that acts as explained above.
For Programmers, you can also use the do_shortcode function
echo do_shortcode( ‘[wpstream_go_live id=””]’ );
A few notes
- This functionality is for Front-End implementation only. This means that it would not work in the WordPress admin area. You will have to use the above in Front-End pages and only streamers on your website that have the role permission and are logged in will be able to broadcast.
- The shortcode, blocks, and widgets for players have been modified and a user_id parameter was added. If you fill the user_id parameter, the plugin will look for the first channel that belongs to that user. The product id will, essentially, be ignored.
- If you want to use the player in Dynamic Mode- (for example each user has a page where you embed its channel player), you need to do that programmatically. Do this by:
- Finding out which user id “owns” that page
- Add the player using the do_shortcode
echo do_shortcode( ‘[wpstream_go_live user_id=””]’ );
- The bandwidth used by your user transmissions will be taken from ‘Your Account’ and you will be responsible for the content created by the user.
- When we create the channels for your users, we will use the title ‘Username Channel’ where the username is that of your user. We will not add a description, images, media, or any other details. If you need these channels personalized for each user, you can do this manually via the WordPress admin area. Alternatively, you can create a ‘Profile Page’ where users can do this.
- As explained above, a user can only have one type of channel- one free and one paid. The plugin will go live on the first one that matches the ‘Type of Channel Settings’.
Styling the shortcode streamers on your website
In case you want to change the looks of WpStream elements, you can do this via css. The Front-End styles for ‘Start Streaming’ shortcode/blocks can be found in wpstream_style.css at the end of the file (around line 445) .
The Front-End block have the class .event_unit_style_front so you can customize any css element by writing a selector that starts with .event_unit_style_front
For example .event_unit_style_front .start_event.wpstream_button{ your css code here..
Final Words
To conclude this tutorial on how to enable regular streamers on your website to go live via the Front-End.
One of the most popular ways that our clients use this feature is for their multivendor marketplace websites. Their websites are e-commerce websites where they sell products and services and they will often collaborate with influencers on these projects. Read more on Live Streaming on E-Commerce websites.
We are constantly updating and adding new features to the plugin to give you the best user experience. Please follow our documentation closely and add any feature requests that you would like to see implemented. Your suggestion may be in a future update!
Check out our YouTube Channel for all our Video Tutorials


Table of Content