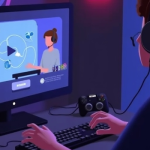
Live Streaming with vMix is a very popular in the pro streaming environment. vMix is a live video production application with plenty of features, including live mixing, recording, switching and live streaming from SD, full HD and 4K video sources such as images, Powerpoint presentations, DVDs, video files and, of course, cameras.
vMix Uses and Features
One of the biggest advantages of vMix is perhaps its versatility – this software allows content producers to create excellent live streams for a wide range of fields, from large scale sports events to small classroom courses. In short, vMix is a great solution for, but not limited to, the following fields:
- Live Gaming
- Online Courses
- Church Streams
- Live Events & Concerts
- Live Sports
- Presentations & Meetings
- Live Shows & Podcasts
Pre-requirements
For this tutorial you will require a website running on WordPress and the WpStream platform. Feel free to check our guide on how to install WpStream to your website. You will also have to install vMix and create a streaming channel on your website.
To create a new free channel, simply go to your WordPress dashboard and go to “Free Live Channels / Free Videos On Demand”, then click on “Add New Free Live Channel / Free Video On Demand”:

Here you will have to add a name for your channel, and then click “Publish”.

Now that we created the channel, click on “Broadcast to Channel” and wait for it to start:

We are now ready to stream. Keep this window open as you will soon need the stream URL and stream key:

Live Streaming with vMixv & WpStream
Let’s take a look at how you can start streaming with vMix directly to your WpStream channel. Start by opening vMix. We can notice that it’s pretty similar to another live streaming software – OBS Studio. You can also check our article on streaming with WpStream & OBS Studio.
First, let’s check our stream settings by clicking on the little gear next to “Stream”.

This will open up the stream settings window, where we can add our Stream Key and Stream URL. Make sure “Destination” is set to “Custom RTMP Server”.

Next, you will have to add your Stream Name Key and Stream URL to the indicated sections:

You can also quickly change your stream video quality, bitrate and audio quality by selecting one from the list:

Now all there is left to do is start our stream. You can simply click on the “Stream” button to start it or click on the little upwards arrow if you have multiple streams ready or want to stream to multiple channels:

Let’s check the channel we created previously to see if the stream started.

The stream is live on our free channel. Great!
Conclusion
As you can see, live streaming with feature-rich vMix is just as simple as with other free live streaming software like OBS studio. Setting up a channel and starting a stream generally takes under ten minutes, even with no previous experience with WpStream.

Table of Content