About Network / IP Cameras
Live Streaming with IP Cameras using WpStream is one of the quickest and easiest ways to cover a particular event. Moreover, its secure and efficient nature allows you to go live on your own website and have as many visitors as possible, without giving them full access to your security cameras.
This article will cover the steps you’ll need to take before you can use your IP cameras for live streaming with WpStream – it takes under ten minutes if you have the following requirements already set up:
- An IP camera or security system with NVR that supports RTSP streaming
- Reliable Broadband Internet Connection
- An Account on WpStream
- The WpStream Plugin on a WordPress Website
- A Live Stream Channel
- An encoder such as OBS Studio
You can also check out this article to find out how to live stream on your website
What is an IP Camera?
IP cameras are different from the plain old webcams. These cameras have their own IP address, which in turn gives them the ability to connect independently to the internet, without requiring a separate device. While these cameras are a bit more sophisticated, their many advantages make up for the effort.
IP cameras are far more versatile, flexible, and thoroughly suitable for longer streams in a way that webcams cannot relate. IP cameras can use either WiFi or Ethernet to access the internet, and can therefore be placed just about anywhere, as long as they have a power connection nearby.
If you don’t have a power supply close to your camera, you can opt for a model that features Power over Ethernet or PoE – this means that your IP camera will be able to run continuously. Because of this, many streamers will choose IP cameras for their 24/7 live streaming setups.
If you’re a first time user of IP cameras, some models offer Real Time Messaging Protocol (RTMP) support right off the bat, but others may require some configuration before being able to use it. Apart from that, some models only support Real Time Streaming Protocol (RTSP), or other protocols that may need additional equipment before starting a live stream on WpStream.
IP cameras do have one slight disadvantage, and that is the price. Models start at around $100, which is slightly higher in cost compared to regular web cameras. However, IP cameras will ensure a better streaming experience for video streamers who require flexibility, reliability, and quality content for viewers.
Studies show that brand perception is important. In one study, 23% of people who were presented a low quality live streaming experience claim that they would hesitate before making a purchase or coming back to a brand. Video quality matters!
IP Cameras Advantages
Analogue cameras transmit analog video signals to the receiver, while IP cameras send information digitally using both security and transmission features from the Internet protocol suite (TCP/IP). This offers IP cameras several advantages:
- Two-way audio can be sent through a single network cable, which in turn allows users to listen & contribute to the subject of the live stream.
- The ability to use a Wireless Network or Wi-Fi.
- Distributed Artificial Intelligence (DAI) can be integrated into the video; DAI can analyze images and gather data in real time.
- IP Cameras use secure data transmission with authentication methods, as well as encryption such as AES, TKIP, WPA2, or WPA.
- Live video can be accessed and viewed remotely by any user with an internet connection and access privileges.
- PoE or Power over Ethernet can supply the IP Camera with power without the need of a dedicated power supply.
- IP Cameras offer better image resolution because of its digital transmission, usually 6 to 20 times higher than analog cameras.
Ensure your IP Camera is connected to a stable network
Before you can start streaming to WpStream with your IP camera, you need to check your internet connection. You might also want to test your internet connection to get a better idea of the settings before streaming – this will ensure a stable stream without any lags. You can check out our article on choosing the best settings for streaming for a more in-depth guide.
Creating your WpStream Account
Creating your WpStream account takes under 5 minutes. First, visit WpStream.net and then click on “Register”
You will be redirected to the registration form. Fill it out with your details.
After registering, you will be redirected to your account dashboard. This page will display the type of account you currently have, as well as other details such as “Streaming Data” and “Storage” available.
Live streaming with IP cameras – Installing WpStream
WpStream functions as a standalone plugin and you do not need any other streaming platform or props. With WpStream, you will be able to live stream pre-recorded videos and live events.
Additionally, you can create subscription based live channels for concerts, yoga classes, and business seminars, available only when using the WooCommerce Subscriptions Plugin, Pay-per-view live streams are also available when using the WooCommerce plugin.
Creating a Free Streaming Channel
- Before you can start your first broadcast, you will have to create a channel on your WordPress website. Visit your WordPress dashboard, then look for ‘Add New’ under WpStream
- Once redirected to the channel creation page, fill out the channel details such as channel name, description and featured image.
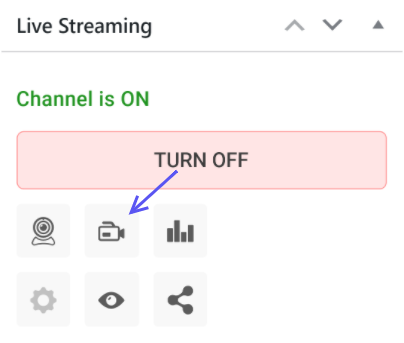
- Once your channel name and details are set up, hit Publish and your channel will be created. Your Free to View Live Channel is now ready. Keep in mind that you can keep a recording of your live stream by simply enabling “Record” under ” Channel Settings”. Now, click on “Turn ON”. This may take a few minutes to load.
- You will then click on “Go Live with an External Streaming App”
Encoder Softwares for Live Streaming with IP Cameras
OBS Studio
Each and every live stream requires an encoder. There are plenty of encoders available on the internet, but OBS Studio is used for the tutorial because of its popularity amongst users.
Open OBS Studio and look for the settings tab. Then go to “Stream” and in the “Service” dropdown select “Custom” from the list. All you need to do now is add your streaming details, as shown below:

After adding your stream details make sure you save your settings. You are now ready to start your stream by clicking on “Start Streaming”.

You will be able to share and view your stream from the page you used to create it:
Click on the “View Channel” link to check your channel. You can also check if the video is streaming properly and make any necessary adjustments.

Other Popular Encoding Software
If you’re not too keen on using OBS Studio for your live stream, here are some of the most popular encoders used by streamers:
vMix
vMix is a great alternative for OBS Studio. This streaming encoder offers similar features to Wirecast and supports video sources with up to 4K resolution, as well as NDI sources. You can, of course, use video files, DVDs, and PowerPoint presentations as sources.
Since vMix supports RTMP video as an output, it’s fully compatible with WpStream, as well as other online video platforms. ‘Recording’ is included as a handy feature, depending on the type of content created.
Furthermore, vMix offers a video call feature, an audio mixer, a tool for adding custom graphics to personalize your stream. There is a Social Media plugin that allows you to record and stream content directly from Twitter, Instagram, or Facebook.
The free vMix version supports only 4 inputs and a maximum streaming resolution of 768 x 576, while the basic HD version will cost you $68.20 for more inputs and higher streaming resolution.
XSplit
XSplit is another popular streaming app. This app comes in two distinct versions, depending on the type of stream you want to start. These are “Gamecaster” and “Broadcaster”. Gamecaster’s design is for gamers because of its simplicity and intuitiveness.
The Broadcaster version is a bit more flexible since it supports a wider range of inputs, including capture cards, videos, and music.
Other features include the capability of recording streams locally, an integrated chat function, the possibility of installing custom plugins, different stream customization options, and the ability to add a chroma key or “green screen”. XSplit is priced on a subscription model.
- 3 Months: $24.95
- 1 year: $59.95
- 3 years: $149.95
- Lifetime: $199 (most popular)
Wirecast
Wirecast is a popular live streaming encoding software developed by Telestream. Telestream released Wirecast 13 back in October 2019. Wirecast 13 offers an in-app video chat feature, 8 track audio mixing, and various improvements. Similar to OBS Studio, Wirecast is RTMP compatible, meaning that it will run smoothly with most Online Video Platforms and can be installed on computers running on Windows and Mac OS.
The only downside of this app is the price – Wirecast Studio will set you back $599, with the premium version costing you $799. Fortunately, there is a trial version available to test its features before fully committing. The Pro version includes ISO source recording, instant replays, scoreboards, and many other features.
Live streaming with IP Cameras Tips
Choose network cameras with excellent image quality & night vision
Your viewers will expect clear image quality from your live stream. They also expect higher or the highest resolution available. To be able to offer them sharp images and excellent details, make sure to pick a megapixel security camera.
These should capture video with 1080p, 4MP, or 5MP regardless of whether you are streaming during the day or night. Apart from the resolution aspect, you will need to check your camera specifications carefully.
- Field of View – You will want to get a camera with a wide viewing angle for better footage.
- IR Range – This spec indicates how far your camera can see in ambient lighting. If you plan on streaming at night, you should opt for a network camera with long range night vision of around 100 feet.
- IR Cut Filter – The IR cut filter allows your camera to capture videos and images in accurate colours.
- Microphone – If you want to record sound for your live stream, pick a camera with a built in microphone. It can make the viewing experience more interesting.
Ensure your internet connection can handle live streaming with network cameras
One of the most important aspects of streaming is having a powerful and stable internet connection. This is why you should definitely check your internet upload speed before starting your stream. The recommended upload speed for HD live videos is between 3 and 5 Mbps, but your top speed should be well over that.
Keep recordings of your stream
WpStream allows users to maintain recordings of all their live streams for later use. This can come in handy in numerous ways. Gradually deleting videos old recordings will provide more storage space.
Protect your privacy when streaming
Protecting your own privacy when surfing the internet is crucial, and the same goes for live streaming. Here are a few tips:
- Never share your stream key.
- Never share your admin access accounts, unless you know and trust the person.
- Do not show personal information during your live streams.
- Limit access to your live streams if necessary.
Conclusion
Overall, live streaming with IP cameras has become quite popular. In order to have a successful and quality live streaming experience for you and your viewers, investing in a good IP camera and encoding software will be worth the momentary dip in your bank account. Once the account is set up on WpStream and the IP camera is running, learning the tricks will only get easier.
Table of Content