Getting Started
You are probably here because you would like to know how to monetize your Fitness Classes to your viewers and possible setting up Video-on-Demand so that they can watch whenever they want. More so, you are looking to make a business out of this and are wondering how you can monetize these videos.
This is where WpStream comes in. WpStream is a platform that allows you to live stream, create Video-on-Demand, and Pay-Per-View videos. It provides an affordable and user-friendly way for small and big businesses alike to showcase their skills and talents through live streaming. According to the size of your audience, we provide four subscription plans that you can choose from, each suiting your own needs.
WpStream can be used on any WordPress website and it is possible to stream directly using specialized RTMP broadcast software such as OBS, WireCast, vMix, Zoom, etc. You can choose to monetize your fitness classes using WooCommerce or offer them for free. You can also monetize live streaming for churches, education, and news broadcasts.
Stream and record your Fitness Class
Before you can start creating channels you will need to create a WordPress website and install the WpStream, and the WooCommerce plugin. The WpStream plugin will handle all technical aspects of creating your channels and managing your video library while WooCommerce handles payments.
Once you have installed the plugin, head over to ‘WpStream Credentials’ in your WordPress dashboard and enter your login details or click on the link in order to register if you do not have an account yet.
Once you have registered, go back to your WordPress and enter the credentials you have just used to register.
You are now ready to create a new channel!
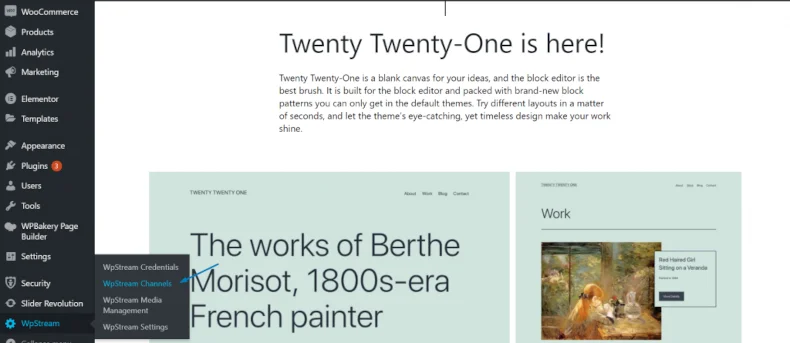
Go to WpStream Channels and click on ‘create a new free channel’.
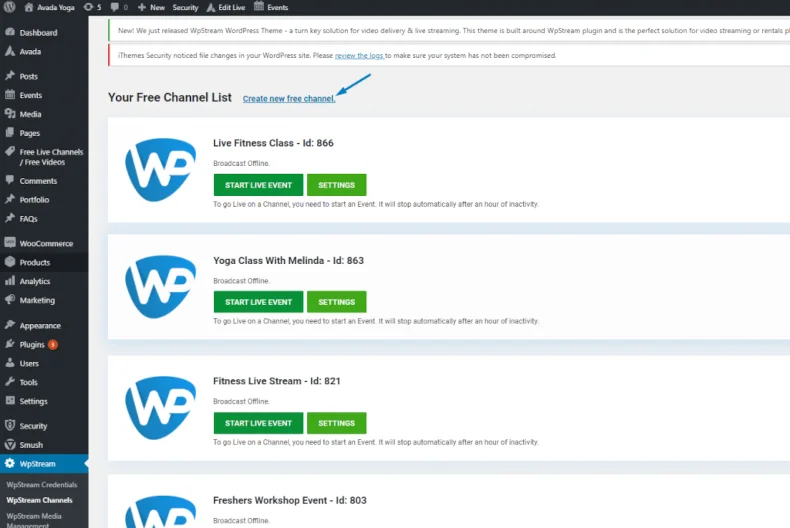
You will now be taken to a page where you will need to fill in the title for your free live video. Once you have given a title to the video and added tags and a photo, you can click on ‘publish’.
After publishing the video, you will get three options. ‘Start Live Channel’, ‘Delete Channel’, and ‘Settings’. Make sure you click on settings to check your defaults and any other settings you may need. ‘Viewer count’, ‘Lock to website’, and ‘Autoplay’ are enabled by default. In this tutorial, we will also be recording our Live Event and transforming it into a Pay-Per-View class. For this reason, we will be clicking on ‘Record’.
Once you have managed your settings, you can click on “Start Live Event”. Here, you will get three options. “Go Live from Browser”, “Go Live with External Broadcaster”, and “Live Metrics”.
OBS Studio
In this tutorial, and in general, we recommend going live with an external broadcaster and highly praise OBS Studio. It is a Pro Broadcasting Tool which is also free and easy to use. Click on “Go Live with External Broadcaster” and a Server and Stream Key will appear.
Go to OBS Studio and click on “Settings” and then “Stream”. You will add the Server and Stream key from WpStream to OBS. Once you have completed this step, click on OK and the RTMP connection will be successful.

Click on “Start Streaming” in order to start broadcasting to your WordPress website. On your WordPress, click on “View Channel” and it will take you to the page where your live event is being broadcasted. You can also share your broadcast on Facebook, Twitter, Pinterest, Whatsapp, LinkedIn, and through Email.
This is how your live fitness class will look like on your WordPress website. Keep in mind that your website is fully customizable and you can add or remove whatever you wish.
To stop streaming, go back to OBS and simply click on “Stop Streaming”. This will stop your broadcast and if you go back to your website, you will find that it has been interrupted.
Your broadcast should stop on your main channel.
This is how you can broadcast a live fitness class to your WordPress website. Next, I will show you how to transform the recording into a Pay-Per-View Video.
Monetize your fitness class: Setting up your Pay-Per-View Video
You have streamed and recorded your fitness class. Now, you will have to transform it into a Pay-Per-View and monetize it. The broadcast that you just streamed has now been recorded and you will find it under “WpStream Media Management” on the left hand side.
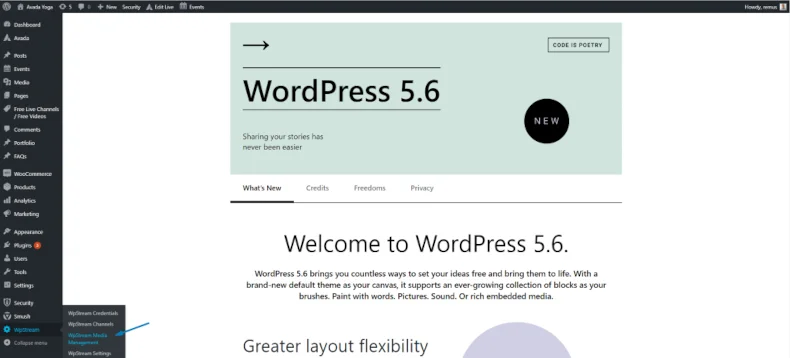
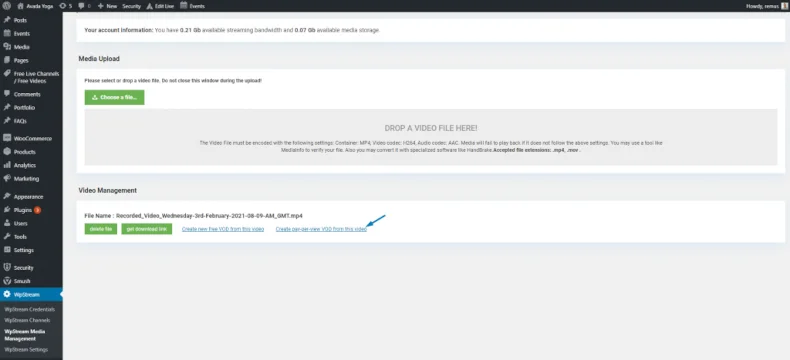
Once you have clicked on WpStream Media Management, it will take you here. Click on the latest file (make sure you read the date and the time to make sure it is the right video) and click on “Create pay-per-view VOD from this video”.
You will give this a ‘Product Name’, make sure it is a Video-on-Demand, give it a price, and click on Publish. You can also add a video description, tags, add and add a photo if you scroll to the bottom of this page.
Once you have published it, this is how it should look like on your website. When a customer clicks “Add to cart” and purchases your product.

The class will then be available to them and the PPV video will appear to your clients like so;
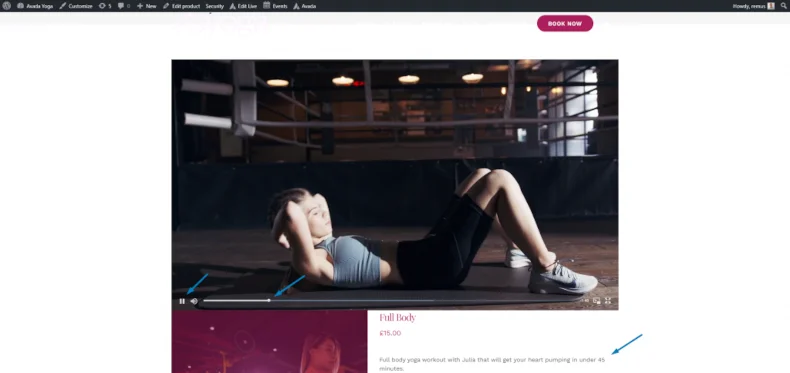
With the PPV, you clients are able to pause, skip forward, backward, and restart. The product image and description can also be seen. Once again, the page is fully customizable. You are able to add your other videos as products so they can work out with you.
Congratulations! Now that you have run through the steps to monetize your Fitness Classes by creating Pay-Per-View live streams, you are now ready to do this on your own. With the help of WpStream, you are all set to start your online fitness business.
Make sure you check out this tutorial in video format as well!
Table of Content


