This guide is useful for website owners who want to Broadcast with OBS on your WordPress site without any monetization options.
Free streaming possibilities can include:
- Presentations of different products.
- Video tutorials.
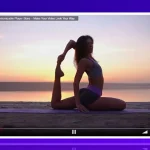
- Ad-supported transmissions of concerts.
- Live broadcasts of cultural events such as the Sunday church mass.
OBS STUDIO
OBS (Open Broadcaster Software) is an open-source live video production software that can live stream and record video and audio. Let’s see how to live stream using OBS.
First, you need to log into your WordPress website. On your dashboard sidebar, there are the plugins. Go to the plugins and click on add new. Type Wpstream in the search bar. Then install and activate the plugin.
Now on the sidebar, click on the WpStream, and you have to connect an account. Click on this link and create an account in WpStream. After completing the account, go back to the WordPress dashboard and type your email and password that you just used to register yourself in WpStream. Then click on save changes. After that, you’ve been connected to wpstream.net.
Requirements
Before streaming with OBS Studio, you will need a couple of things, including:
- A website running on WordPress
- The WpStream Plugin
- OBS Studio
- Plugin is available here: https://wordpress.org/plugins/wpstream/
- Create your account on WpStream
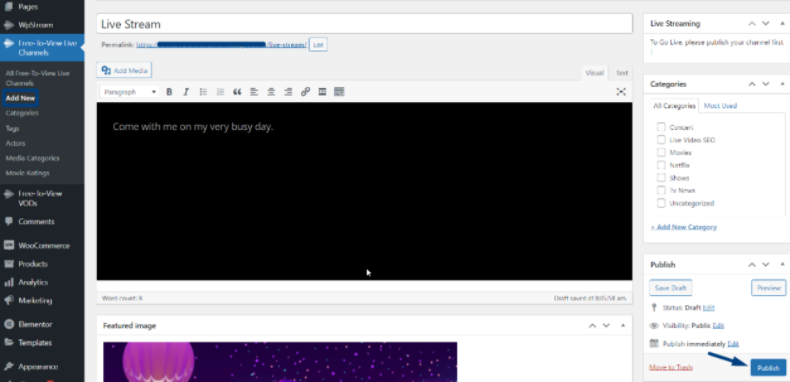
Before starting to broadcast, you’ll have to create a free live channel first. Simply go to your WordPress dashboard and look for the “Free to view live channels” section. Then click on “Add New”. Fill out your channel details by adding a featured image, description and a title for your free channel.
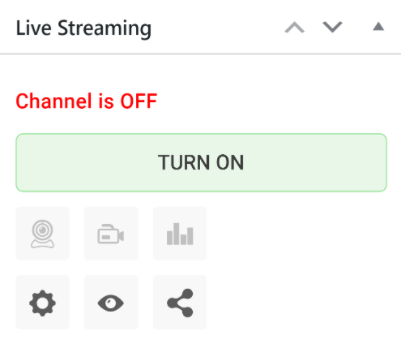
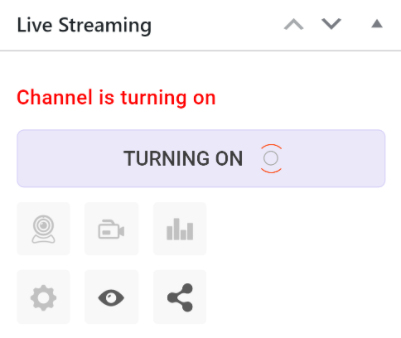
- You are ready to “TURN ON” your channel. Once your channel has been turned on, you can go LIVE with an External Streaming App.
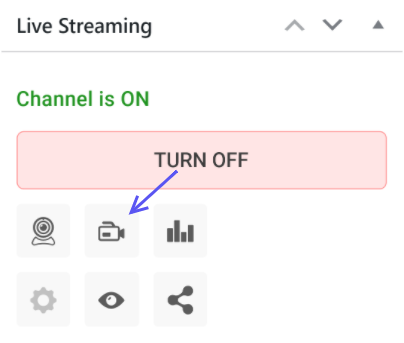
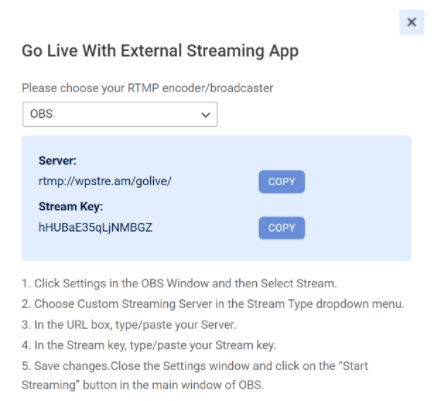
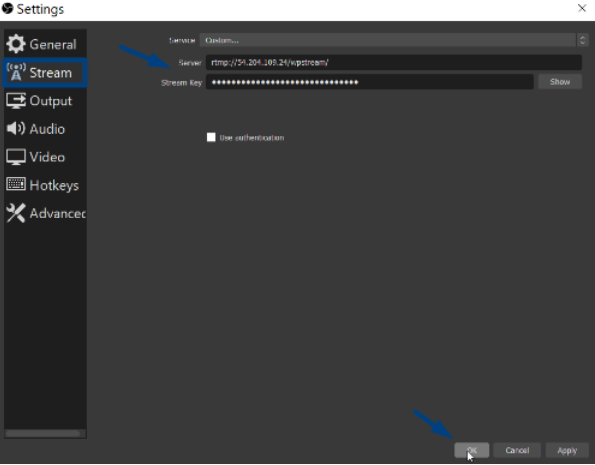
- Choose your preferred streaming APP. We are using OBS Studio. Copy the Server and Stream Key.
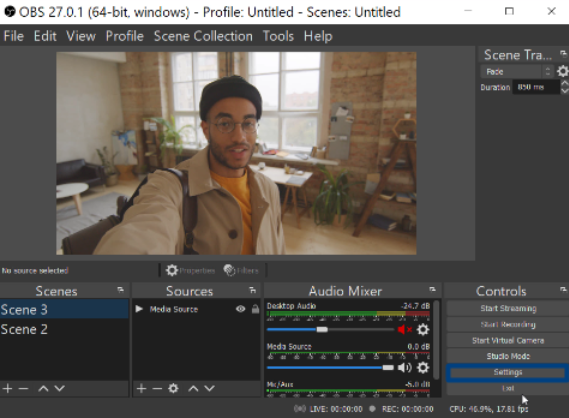
- Open OBS Studio, go to “Settings”, and then “Stream”
- Click on “Start Streaming”, go back to WpStream and click on “View Channel”
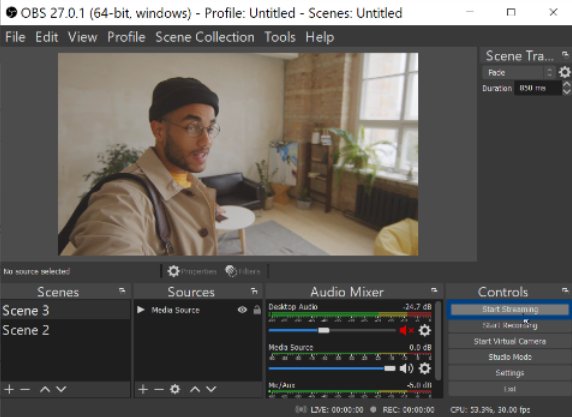
- Go to OBS Studio and click on “Settings”.

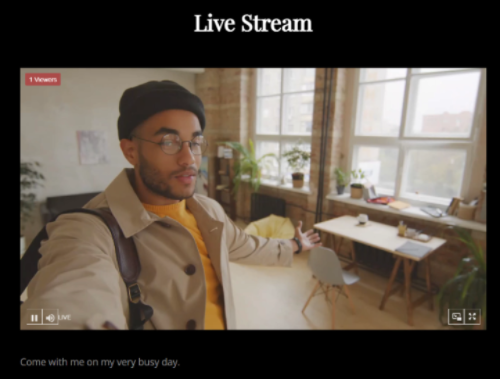
- You will be taken to your Live Stream immediately.
- Once you are done, go back to OBS Studio and click on “Stop Streaming”
Conclusion
That is how you live stream with OBS Studio on your WordPress website. We also ran your through the process of setting up a channel, and going LIVE with OBS Studio on WpStream. You can also check out this page for instructions on how to use other Streaming Apps or ‘External Broadcasters’ with WpStream. Check out our series on ‘Creating your Video Streaming Website‘ on WordPress.
Table of Content