Updated February 9th, 2026
Live streaming is an effective way to reach and interact with a wider audience. While platforms like YouTube and Facebook allow you to host live video content, they don’t offer the same level of control and customization as hosting it on your own website.
In this post, we’ll show you how to set up a live streaming website in six easy steps, including the benefits and necessary equipment for hosting your own streams.
Whether you’re a worship leader at a church, fitness trainer, trading advisor, or wedding planner, a live streaming website can be a valuable tool for engaging with your viewers. So, let’s get started!
What is a live streaming website?
Live streaming is the process of broadcasting video or audio content over the internet in real time. A live streaming website is any web page that is used to host this streamed content. There are a few different types of streaming websites to consider, each with its own benefits and drawbacks.
One type of streaming website is one that has embedded streaming content. These sites may not be built primarily for live streaming, but they include access to live video or audio content. For example, a news website might include a live stream of a press conference on its homepage.
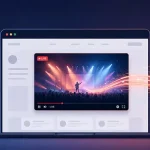
Alternatively, by including embedded streaming content on your own website, you can build your own streaming platform, similar to YouTube Live or Twitch. You can stream live on your website and allow others to live stream as well, depending on the live streaming platform you use. Building this kind of streaming website offers streamers the most control over their stream content, as they will be broadcasting on their own site rather than hosting their stream on a separate video streaming platform.
This brings us to the other main type of streaming website – a dedicated live streaming platform. These platforms allow a large number of different content creators to broadcast their live video content and often have a larger audience and more built-in features. On this type of streaming website, content creators will create ‘accounts’ which they will stream through. The platform will have full control over these accounts, and will generally have rules and guidelines which streamers must follow. As a result, if you choose to stream on this type of streaming website, you may have less control over your content and how it’s presented compared to hosting your own live streaming website.
It’s important to note that streaming on-demand video through services like Netflix, Hulu, Disney+, or Amazon Prime Video is not the same as live streaming. This guide will show you how to set up a live streaming website, not a video streaming service.
Why should you live stream on your own website?
Live streaming is a great way to widen your audience and interact with them in real time. It has a wide range of applications, from hosting gaming and eSports events to running online exercise classes to broadcasting sermons and other religious services to a wider congregation.
There are several advantages to streaming on your own website versus using a hosted streaming service like YouTube Live, Facebook Live, or Twitch. One major advantage, which we have briefly touched on already, is that you have more control over the content and appearance of your stream. You can fully customize the look and feel of your video streaming website to match your brand or style, and you have complete control over the content that’s being broadcast. This includes the ability to add custom branding, use a custom domain name, and incorporate your own ads or sponsorships.
Another advantage is that you have more options for monetization. Hosted streaming services often have limited monetization options or strict guidelines about how you can monetize your content. By streaming on your own website, you can choose your own monetization strategies and keep a larger share of the profits. Some options for monetizing live streams include ads, subscriptions, and pay-per-view options.
Finally, streaming on your own website is often more extendible and customizable. You can add additional features and functionality as needed, and you’re not limited by the capabilities of a hosted streaming service, meaning you’ll have more control over things like video quality and user experience.
There is a huge range of tools and resources available for building and extending the functionality of your live streaming website, including professional live broadcasting software and hardware, multistreaming tools, and more. By hosting your stream on your own website rather than a third-party video streaming site, you are able to take advantage of these tools, allowing you to create a live streaming website that fully meets your needs and providing opportunities for growth and expansion over time.
How to make a live streaming website in six steps
In this section, we’ll walk you through the process of creating your own streaming website in six easy steps. Whether you’re looking to start your own video streaming business or simply looking for a streaming solution to host occasional online live events, having your own live streaming website can be a powerful tool for reaching and engaging with your audience.
We’ll cover everything you need to know, from choosing the right streaming platform to setting up your equipment and going live for the first time. By the end of this section, you’ll be well on your way to creating and hosting your own successful live streams.
1. Define your goals and requirements
Before you set up a live streaming website, it’s essential to have a clear understanding of your goals and requirements. This will help you choose the right streaming platform and equipment for your needs, and ensure that you’re able to effectively reach and engage with your audience. Here are a few key considerations to keep in mind as you define your goals and requirements:
- The type of content you’ll be broadcasting: Different types of content will require different streaming setups and have different priorities. For example, a church may be interested in streaming weekly sermons, while a fitness instructor may be looking to broadcast regular exercise classes. A business owner, on the other hand, may be interested in streaming ad hoc events. Understanding the nature of your content will help you determine the best approach for your streaming website.
- The type of viewers you’re trying to reach: This will impact how you share your content and what features you need from your streaming platform. For example, if you’re trying to reach a younger, tech-savvy audience, you may want to consider a platform with more advanced features and integration with social media. On the other hand, if you’re trying to reach an older or more traditional audience, you may want to prioritize a platform with a more user-friendly interface and simple sharing options.
- Your streaming objectives: This will inform your priorities when it comes to choosing a streaming platform, equipment, and other aspects of your live stream. Different objectives might include making money, growing your audience, producing high-quality content, and more. For example, a church may prioritize full control over stream content to avoid sermons being interrupted, while a fitness professional might prioritze monetization options that enable them to sell memberships or offer pay-per-view exercise classes.
2. Set up your website
Now that you’ve defined your goals and requirements, it’s time to set up your live streaming website. To do this, you’ll need to choose a domain name and register it with a web-hosting service. You’ll also need to choose a content management system (CMS) to build your website.
One popular CMS option is WordPress, which has a number of benefits for live streaming websites. It’s free and easy to use, which means there’s a low barrier to entry for those who are new to website building. It’s also open-source, which means it’s almost infinitely extendible and customizable. Plus, it’s very straightforward to embed live streams into a WordPress website, especially if you choose the right live streaming platform.

Once you’ve chosen your CMS, hosting provider, and domain name, you can start setting up your website itself. This will involve designing the layout and look of your website, as well as adding any necessary features and functionality. Some things to consider as you set up your website include:
- Monetization: If you intend to monetize your stream content, you’ll need to make it easy for viewers to purchase memberships or pay-per-view content (depending on your monetization model). Using a flexible payment gateway like Stripe or PayPal will ensure that you can easily accept payments from your viewers.
- Video-on-demand (VOD) content: If you want to make your live videos available as VOD content after the stream has finished, you’ll need to make it straightforward for website visitors to find the videos they’re looking for. This could involve providing an organized video library or creating a search function to help viewers find specific content.
By considering these and other factors as you set up your website, you can create a user-friendly and effective platform for your live streams.
3. Choose a live streaming platform
Once you have your website set up, it’s time to choose a live streaming platform. There are many options available, but it’s important to choose one that meets your specific needs and goals. Here are a few things to consider when choosing a live streaming platform:
- Control over content: It’s important to have full control over the content of your streams, to ensure that you can broadcast exactly what you want without censorship or intrusive ads.
- Good monetization options: If you plan to monetize your streams, it’s important to choose a platform with flexible monetization options that support your chosen model. This could include pay-per-view, memberships, free streams, or even donations.
- Customizability: Being able to fully customize your streams and stream setup will allow you to create a unique and engaging experience for your viewers. Look for a platform that offers a range of customization options, as well as compatibility with any RTMP-compatible streaming software or hardware.
- Compatibility with your website and equipment: It’s important to choose a live streaming platform that is compatible with your website and the equipment you’ll be using to stream. This will ensure that you can easily embed your streams into your website and that everything runs smoothly.
One platform that meets all of these criteria is WpStream. WpStream is a WordPress plugin that enables you to stream live content directly to your WordPress website, making it easy to embed your streams into your website and giving you full control over what you broadcast. This is important for anyone who wants to ensure that their streams are not censored or interrupted by intrusive platform-based ads. With WpStream, you can even allow other users to stream from your website, enabling you to build your own streaming platform similar to YouTube or Twitch.
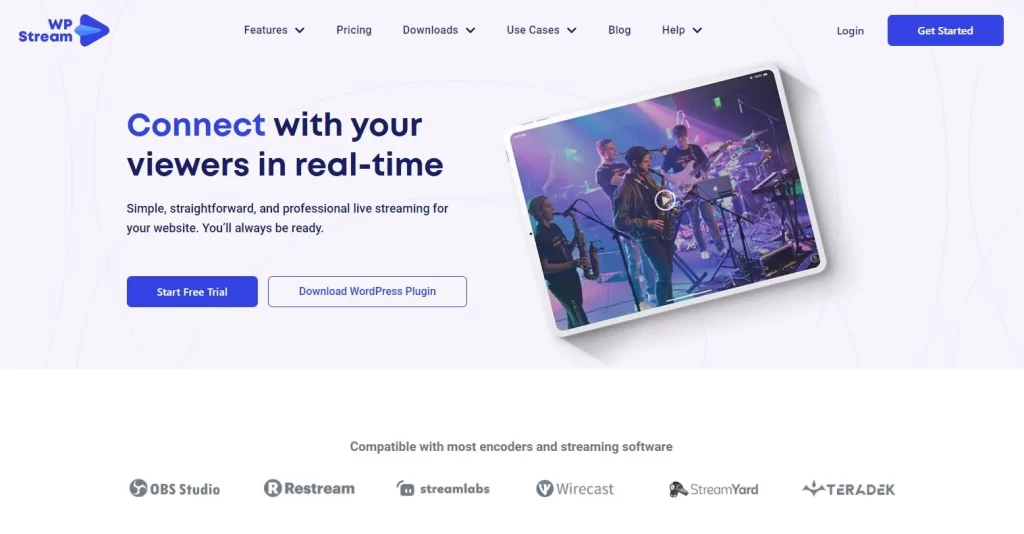
WpStream is also fully customizable, allowing you to brand your streams as you see fit and customize your stream setup to meet your specific needs. It’s compatible with any RTMP-compatible streaming software or hardware, including the most popular multistreaming tools, which makes it easy to extend and customize your stream setup.
In terms of monetization, WpStream integrates with WooCommerce to support all major monetization models, including pay-per-view, memberships, free streams, and even donations through GiveWP. This gives you a range of options for monetizing your streams and helps you find the right approach for your business model.
Finally, WpStream offers scalable pricing plans to fit the needs of any business model. Whether you stream intermittently to a small audience or daily to thousands of viewers, WpStream has a pricing structure that will work for you. Plans are based on requirements for stream data, number of concurrent viewers, and recording data, so you only pay for what you need.
4. Gather the right equipment
To set up your live streaming website, you’ll need to gather the right equipment. The equipment you need will depend on your streaming objectives and your potential audience.
For video, you’ll need a camera. If you plan to stream from a fixed location, you might consider using a professional-quality DSLR or PTZ (pan, tilt, zoom) camera. These cameras are generally more expensive, but they offer higher image quality and more control over your shots. If you plan to stream from a mobile location, you might consider using your laptop webcam, phone camera, or tablet camera. These options are more portable and easier to use, but they may not offer the same level of image quality.
If you are looking to invest in a more professional streaming setup, you might even consider using multiple cameras, in which case you’ll also need a video switcher. A tripod is another straightforward piece of equipment that can give your stream quality a boost by keeping your video steady and consistent.

For audio, you’ll need a microphone. For some types of streaming, audio quality can be even more important than video quality; in these cases, you might consider using a professional USB or XLR mic. These microphones offer better sound quality, and in the case of XLR microphones, more control over your audio input. It is worth noting, however, that if you do choose to invest in an XLR mic, you’ll also require an audio interface. Alternatively, for a cheaper, more straightforward option, you can use a built-in phone or laptop microphone or a headset microphone
Another crucial piece of streaming equipment is an encoder to process your audio and video streams and send them to your website in a format that your stream viewers can watch. You have the choice between a software encoder or a hardware encoder. Hardware encoders are generally more expensive but more stable, while software encoders are generally more flexible. Some popular options for software encoders include OBS Studio, Wirecast, and vMix, all of which are compatible with WpStream.
It may seem obvious, but it’s also important to ensure that you have a good internet connection before you start broadcasting, to ensure the best viewing experience for your audience. Run an internet speed test to check your upload speed before you start streaming, and avoid connecting to mobile data and Wi-Fi at the same time in order to keep your connection as stable as possible.
You may also want to consider using external lighting or other peripherals to enhance your streams. External lighting can help to improve the overall look of your streams, while teleprompters can help you deliver your message more smoothly. Green screens can be used to add special effects or to create a more professional look for your streams. Again, the setup you use all depends on what you are looking to achieve with your online video content.
Regardless of the equipment setup you are working with, you can be confident that WpStream will integrate well with your chosen software and hardware. It works with anything from your Android or iOS tablet or phone to a live streaming setup using professional, industry-standard equipment. By gathering the right equipment and using WpStream, you can create a professional-quality live streaming setup that meets your specific needs.
5. Promote your stream effectively
To attract more viewers to your live streaming website, it’s important to promote your stream effectively. Here are some specific tips and examples for promoting your stream:
- Create effective social media posts: Share links to your stream, post updates about upcoming events, and interact with your followers to build up a loyal audience. Use eye-catching graphics and catchy headlines to grab people’s attention and make them want to watch your stream.
- Use paid adverts effectively: Paid advertising can help you reach a wider audience, but it’s important to use it wisely. Research your target audience and choose the platforms and ad formats that are most likely to be effective. Use clear and concise headlines and calls to action to grab people’s attention and make them want to watch your stream.
- Optimize your website for search engines: Use SEO (search engine optimization) techniques to help your stream content rank well in the search engine results pages (SERPs). This could include optimizing your website for keywords related to your content, using relevant tags and titles, and ensuring that your website is mobile-friendly and easy to navigate.
- Encourage recommendations: Make sure your stream quality is the best it can be to encourage your viewers to share your content with others. Encourage them to leave comments, ask for feedback, and interact with your audience to build up a sense of community around your stream.
- Measure the effectiveness of your promotion efforts: Track metrics like the number of views, the number of shares, and the number of new followers you get as a result of your promotion efforts. By understanding how well your promotion strategies are working, you can refine your approach and make adjustments as needed.
By following these strategies, you can effectively promote your stream and attract more viewers to your live streaming website, but it’s important to remember that promotion is an ongoing process. As you continue to stream, be sure to continue promoting your content and engaging with your audience to build up a loyal following. With the right strategies and tools in place, you can effectively promote your live streaming website and reach a wider audience.
6. Go live with WpStream
Going live with WpStream is easy. Simply follow these steps:
1. Download and install the WpStream plugin on your WordPress website. If you’re not sure if WpStream is right for you, you can try out the free trial to test all of the plugin’s features before committing.
2. Create a new streaming channel. This is where you’ll be able to customize your channel settings and set up your stream.

3. Embed your channel into a page on your site. You can do this using the WPBakery or Elementor shortcodes, or by manually adding the WpStream shortcode into a post or page. You can use the following code:
[wpstream_player id="1234" ][/wpstream_player]
(where “1234” is replaced with your channel ID).
4. Go live! You can do this via your webcam or by using an external streaming service.
With these simple steps, you’ll be able to stream live content directly to your website in no time.
Bonus: Analyze your stream’s performance and make improvements
To get the most out of your live streaming website, it’s important to analyze your stream’s performance, get feedback from your viewers, and test out different approaches to see what works best for your audience. Here are a few strategies to consider:
- Analyze your stream’s performance using tools like WpStream’s built-in live statistics or analytics platforms like Google Analytics. Look at metrics like viewer engagement, retention rates, and conversion rates to get a sense of how your streams are performing.
- Follow up with your stream viewers and get feedback on what you can improve. This can be as simple as asking for feedback on social media or through email campaigns, or you can set up more formal surveys or polls to gather more in-depth insights.
- Test out different equipment setups to see what works best for your audience. This could involve trying out different cameras, microphones, encoders, or lighting setups, or even tweaking your video bitrate and FPS settings.
By taking the time to analyze your stream’s performance and make improvements based on feedback and experimentation, you’ll be able to create a more engaging and successful live streaming website.
Take the first steps towards launching your own live streaming website
Live streaming on your own website has many benefits, including full control over your content and the appearance of your stream, as well as more flexibility with monetization. It’s important to consider your goals for your stream, the type of content you want to produce, and the kind of audience you want to reach when setting up your live streaming website.
If you’re looking for a platform to help you stream live content to your own website, consider WpStream. WpStream is compatible with all kinds of streaming setups, fully customizable and extendible, and offers flexible monetization options to help you make the most of your live streaming efforts. Plus, with total control over your stream content and flexible pricing plans to fit your needs, WpStream is the perfect choice for anyone looking to add live streaming to their website.
Try out the full feature set with a free trial or check out the pricing calculator to find a plan that fits your needs.
Table of Content