VOD or video on demand is a media distribution system which gained immense popularity in recent years, over traditional entertainment devices such as the TV.
From documentaries and movies to stand up comedy shows and even music videos, everyone simply loves VOD and they quickly became a part of day to day life. Let’s take a look at how you can leverage your video archive and set up a mixed video & streaming channel with WpStream.
In this guide we’ll cover how you can create YouTube and Vimeo based channels for your website, as well as how to create channels from your local video library and external sources. Feel free to check our article on how to manage your WpStream video library.
This guide is recommended for website owners who want to:
- Create mixed video content websites from different sources such as YouTube or Vimeo
- Create different channels from their uploaded videos
- Create channels from external videos
Requirements
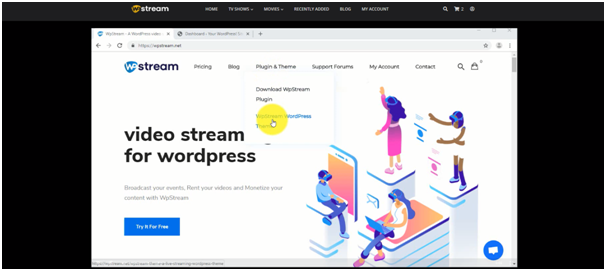
Before you can start creating channels you will need to create a WordPress website and install the WpStream Plugin. The WpStream plugin will handle all technical aspects of creating your channels and managing your video library. This plugin can also be used with and is required by the WpStream Theme which is available HERE. For this tutorial you can either simply install the plugin or install the theme and the plugin. Feel free to check out our guide on how to install WpStream on your website.
After successfully installing WpStream, simply head on over to WpStream.net and create your account. You will have to pick between a few different broadcasting packages or simply a free trial with no credit card requirements. Each broadcasting package offers different amounts of Storage and Bandwidth. As a rule of thumb, you should pick a package that offers a little bit over the amount of bandwidth and storage you will need, just to avoid any problems in the future. Once you created an account and selected a package, your account dashboard should look like this:

Now go back to your website’s dashboard and head over to WpStream, then click on WpStream Options. You will have to submit your WpStream details to this section in order to link your account to your website. After adding your account details, a message will appear, as shown below:

Creating a Video Channel From Video Library
To create a channel from your website’s video library, you will first have to upload a video. Go to your WordPress dashboard, then click on “WpStream” and “WpStream Media Management”:

Now let’s upload a video. Click on the “Choose a file..” button and select a file, then wait for the upload to finish:

Now that the upload is finished, head over to “Free Live Channels / Free Videos” and click on “Add New”:

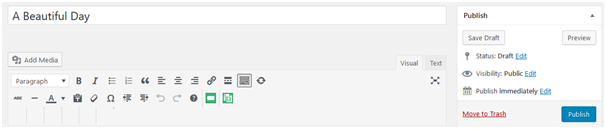
Now add a title for your channel. The title will also be used as the channel’s permalink:

Go down to “Live Channel/Video Settings” and select “Free Video – encrypted streaming & copy protection” from the “Media Type” dropdown:
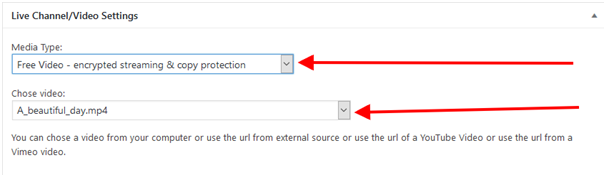
After that, you will be able to select a video from your media library. Now, finish your video channel by clicking “Publish”.
The video can be viewed immediately after publishing the new video channel:

Creating a Video Channel From YouTube
To create a channel from a YouTube video, simply go over “Free Live Channels / Free Videos” and click on “Add New”:

You will have to add a title for your new channel:

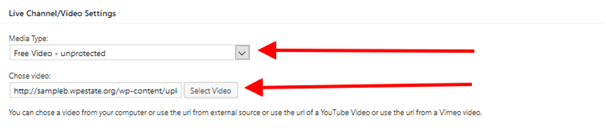
Now go to “Live Channel/Video Settings” and select “Free Video – unprotected” from the “Media Type” dropdown:
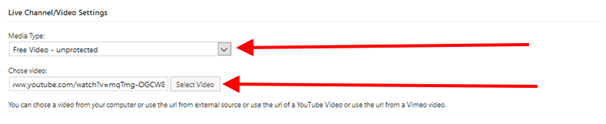
You will also have to add your YouTube video URL in the “Choose video” section. Now all we need to do is click “Publish”. The video is available after publishing our channel:
Creating a Video Channel From Vimeo Video
Creating a channel from a Vimeo video is done much the same as with YouTube. Go to “Free Live Channels / Free Videos” and then click on “Add New”:

Add a name for your new channel:
And then go to “Live Channel/Video Settings”. Here you will have to select “Free Video – unprotected” from the “Media Type” options:

Once you have made the selection, add your Vimeo link into the “Choose video” section. Click “Publish” and then you can see the video:

Creating a Video Channel From an External Source
Now, let’s create a video channel from an external source. Go to “Live Free Channels/Free Videos” and select “Add New”, as shown below:

As usual, add a name for your new channel:
Go down to “Live Channel/Video Settings” and select the “Media Type” dropdown. Here you will have to select “Free Video – unprotected”.
After selecting “Free Video – unprotected”, simply add the link to the media file you want to use for your channel.
Please note that certain requirements need to be met for the video to play, namely the video file has to use an .mp4 or .mov extension, and the video file must be encoded with the following settings: Container: MP4, Video codec: H264, Audio codec: AAC. Media will fail to play back if it does not follow the above settings. You may use a tool like MediaInfo to verify your file. Also you may convert it with specialized software like HandBrake.
Conclusion
WpStream allows business owners to easily create multiple types of channels from different sources, making for a more flexible and enjoyable website. You can also check our article on how to manage your video library with WpStream where we focus on creating pay per view and subscription products from video files.
Table of Content